

-
Getting Started (38)

-
Troubleshooting (19)
-
Open Stack (15)
-
Horizon [GUI] (10)
- Creating Additional Networks in OpenStack Using the Horizon Panel
- Using Horizon for Snapshots
- Allocating and Attaching a Public (Floating) IP to an Instance
- Creating a volume from the Horizon dashboard
- Horizon for Administrators
- Launching an instance from the Horizon dashboard
- Launching an instance from the Horizon dashboard (OpenStack Newton release)
- How do I set a reverse DNS (PTR) record for an IBM Bluemix Private Cloud instance?
- Using Horizon
- Horizon Troubleshooting FAQ
-
Nova [Compute] (13)
-
Neutron [Networking] (22)
-
Glance [Images] (6)
-
Cinder [Block Storage] (13)
-
Keystone [Identity] (8)
-
Heat [Orchestration] (7)
-
Ceilometer [Telemetry] (1)
Horizon for Administrators
Administration in Horizon
In addition to Horizon’s standard OpenStack management features, admin users have access to an admin tab on the left navigation area, providing access to the System panel and the Identity panel. Let’s look at what features are offered in these sections.
Identity
Let’s start at the bottom with Identity, which enables admin users to administer the Keystone service. In this panel, you create and delete users, projects, groups and roles.
Key terms are:
User : Digital representation of a person, system or service who uses OpenStack cloud services.
Project/Tenant : A container used to group or isolate resources and/or identity objects.
Role: A personality that a user assumes that enables them to perform a specific set of operations.
Groups: A groups work as the link between users and roles.
Domains: A domain defines the administrative boundaries for management of Keystone entities. A domain can represent an individual, company, or operator owned space.
Users are assigned a role. Then they are assigned to a project that has a predefined quota of resources. See Managing users and groups for more information.
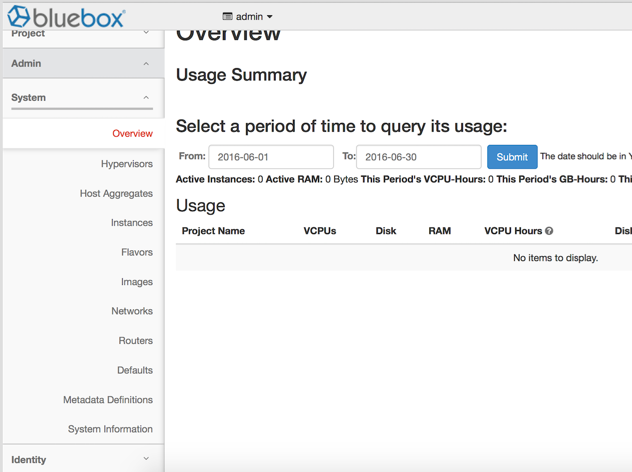
System
Back at the top, the System panel provides details about the state of your private OpenStack cluster. Let’s take a look at the most commonly used options.
-
Overview: This option provides a list of all projects currently running on your private OpenStack cluster. The Overview also describes the number of vCPUs, amount of RAM and disk being consumed by each project, as well as disk and vCPU hours for each project.
-
Hypervisor: The Hypervisor option provides insight into the machines that undergird your OpenStack private cloud. Navigate here to see capacity and usage metrics for each hypervisor.
-
Host Aggregates: This option provides a list of host aggredates and availablity zones. See Host Aggregates wiki for more information.
-
Instances: This option allows you to get more detail about all running instances in your IBM Bluemix Private Cloud. You can also delete instances from these pages.
-
Flavors and Images: Create your own flavors and upload custom images. Be sure to set access to public so these new flavors and images are available within your projects.
-
Networks and Routers: These options allow you to manage all networks and routers in your IBM Bluemix Private Cloud.
-
Defaults: Set the quota set by default for all new tenants.
-
Metadata Defintions: Manage all the customized metadata definitions.
-
System Info: Review details about all services available and running on your OpenStack private cloud. It is also possible to check the status of a given service from this menu.