

-
Getting Started (38)

-
Troubleshooting (19)
-
Open Stack (15)
-
Horizon [GUI] (10)
- Creating Additional Networks in OpenStack Using the Horizon Panel
- Using Horizon for Snapshots
- Allocating and Attaching a Public (Floating) IP to an Instance
- Creating a volume from the Horizon dashboard
- Horizon for Administrators
- Launching an instance from the Horizon dashboard
- Launching an instance from the Horizon dashboard (OpenStack Newton release)
- How do I set a reverse DNS (PTR) record for an IBM Bluemix Private Cloud instance?
- Using Horizon
- Horizon Troubleshooting FAQ
-
Nova [Compute] (13)
-
Neutron [Networking] (22)
-
Glance [Images] (6)
-
Cinder [Block Storage] (13)
-
Keystone [Identity] (8)
-
Heat [Orchestration] (7)
-
Ceilometer [Telemetry] (1)
Allocating and Attaching a Public (Floating) IP to an Instance
Floating IPs are just publicly routable IPs. Customers can assign them to their instances, making them reachable from the outside world.
There are two basic parts to the floating IP process: allocation and attachment. You must attach because you don’t want someone coming along and grabbing your IP. Here’s how to allocate and attach your new IP:
-
From your Horizon Dashboard, under the Project section, go to Instances. Next to your Instance, pull down the dropdown box on the right and choose Associate Floating IP:
-
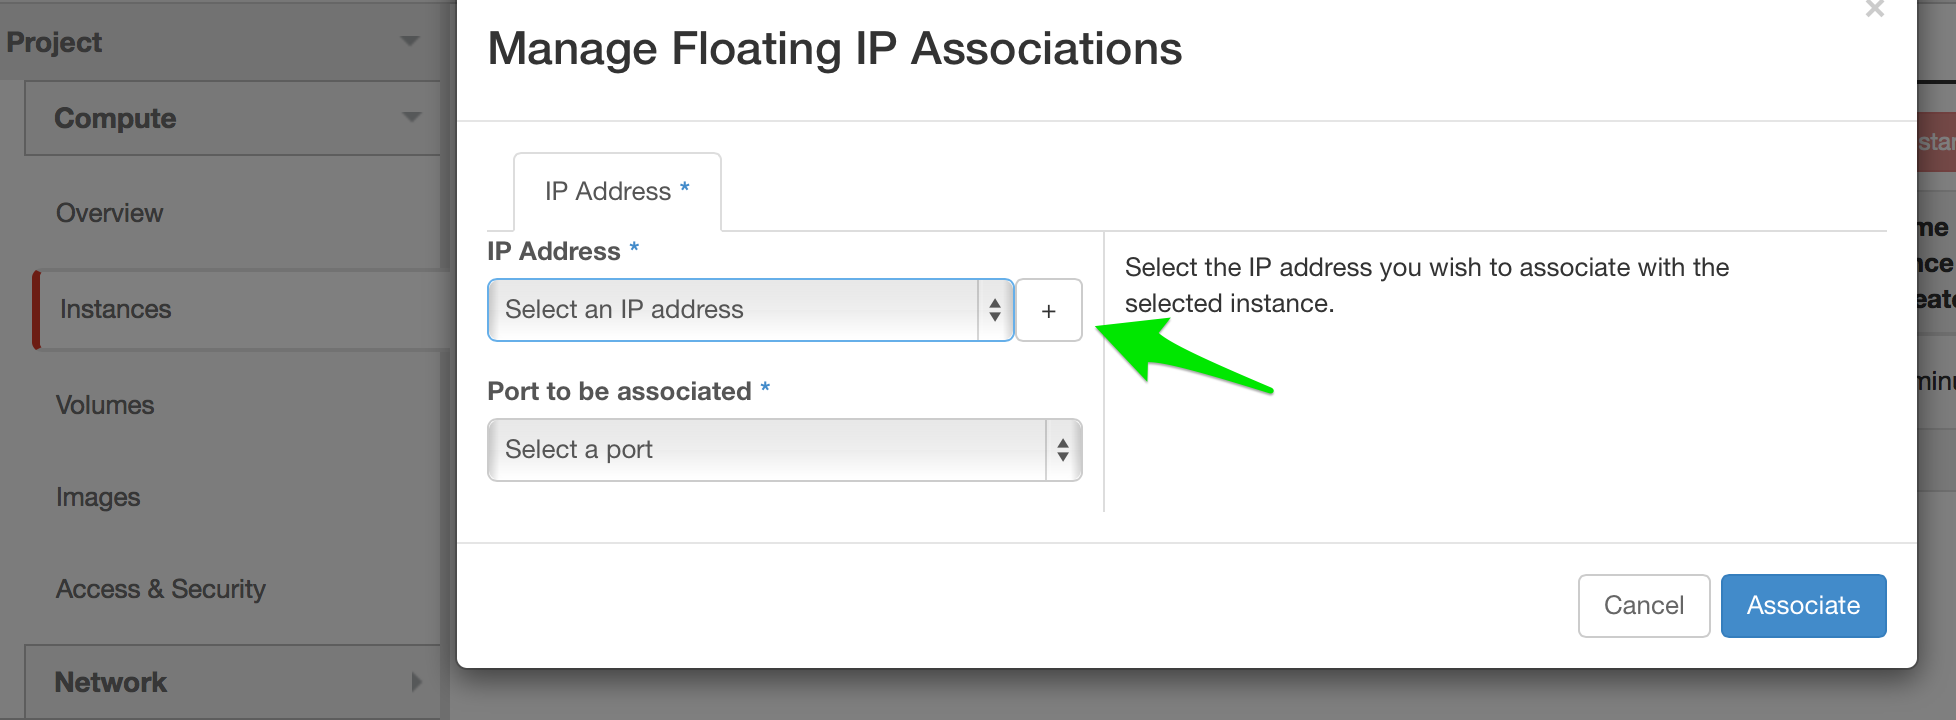
In the Floating IP dialog box, if you don’t have any IPs listed in the dropdown, click the plus (+) sign to allocate a new floating IP to your account:
-
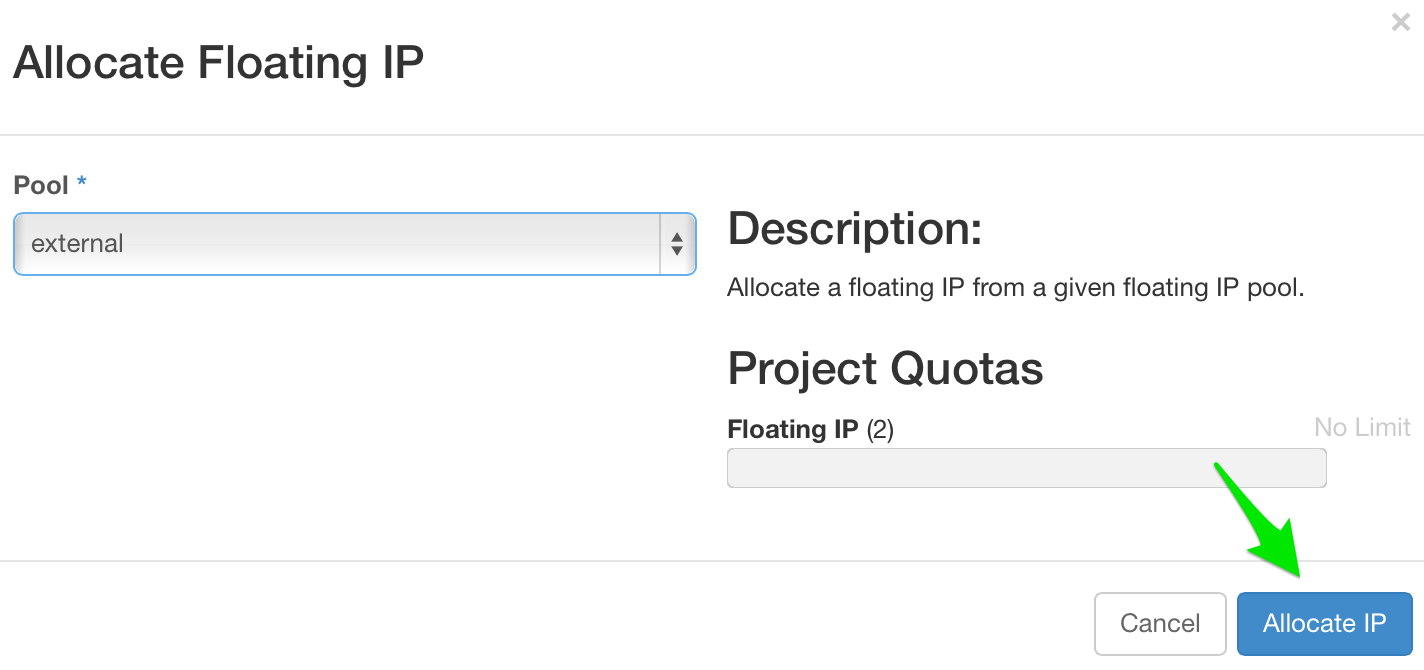
Allocate the IP to your pool by clicking the Allocate IP button:
-
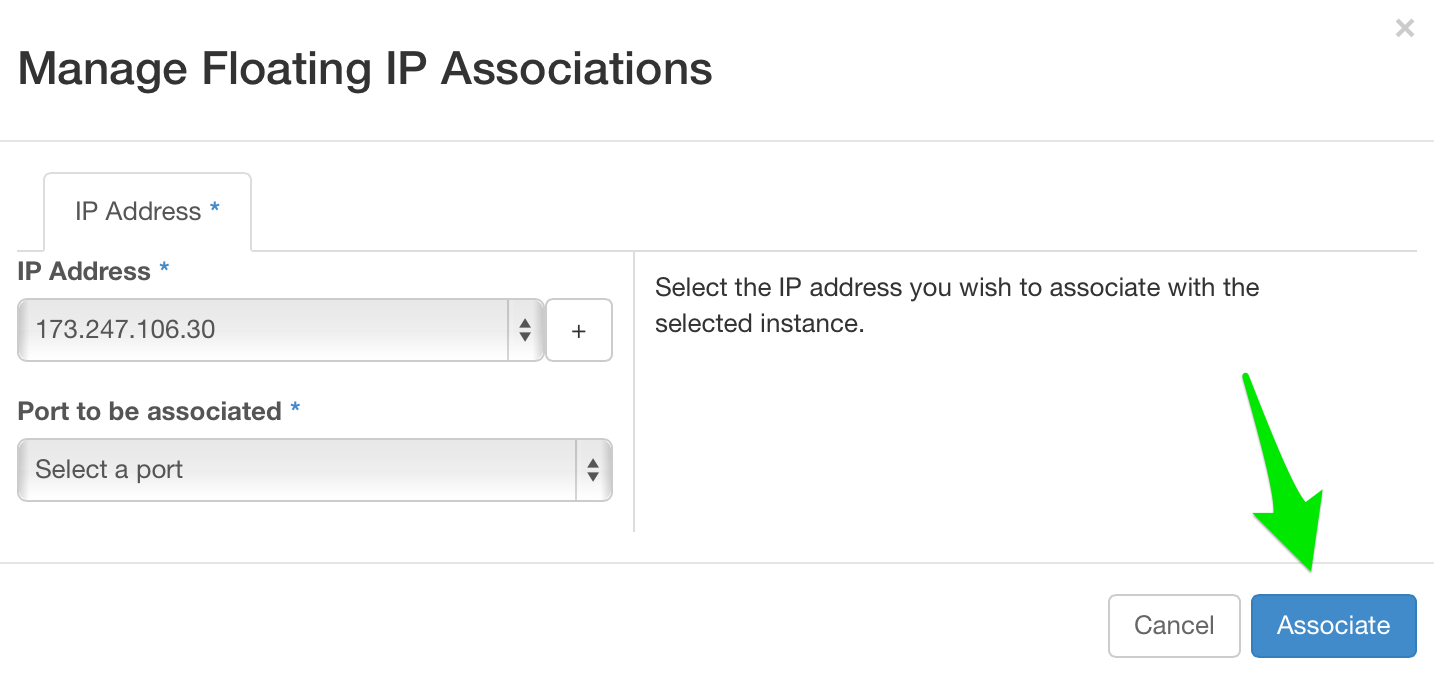
Observe your new floating IP in the dropdown. You can now click the Associate button to attach it to your instance.
You also can create floating IPs from the command line interface.
- In OpenStack, floating IPs are publicly routable IPs that you assign to your VMs. What happens inside the VM once the floating IP is added? The answer is … nothing. If you log in via SSH and display the network configuration, you will see there is still a single network interface with a fixed IP configured. All setup is done on the compute hypervisor itself. OpenStack Neutron sets up the NAT between the VM’s fixed and floating IPs.
One of the big advantages of floating IPs is: If a VM dies, you can re-use the floating IP by attaching it to another VM.
For more information, please see: https://www.mirantis.com/blog/configuring-floating-ip-addresses-networking-openstack-public-private-clouds/