

-
Getting Started (38)

- Connecting to your OpenVPN server
- Setting up OpenVPN server on your instance
- Bluemix Private Cloud Components
- What Should I Do Prior to Detaching a Volume?
- Virtual python environments and you: A developer's primer
- Technical FAQ
- IBM Bluemix Private Cloud Building Blocks (Community Edition)
- Building Blocks for IBM Bluemix Private Cloud with Red Hat
- IBM Bluemix Private Cloud with Red Hat - Product Overview
- General Product Overview
- Resizing an Instance (Non-live)
- Set Up Network Connectivity Between Multiple Cloud Environments, Using the Private Network
- Customer Guide for Windows Activation
- View More ( 7 )
Common Technical Questions
- Adding or removing subscribers to a ticket
- How do I view my bill?
- How do I report an issue?
- How do I escalate a ticket?
- Bluemix Private Cloud Status Pages
- Transferring A Domain From Blue Box
- View More ( 2 )
Common Administrative Questions
- Box Panel User Guide
- Box Panel, Site Controller, and IBM Bluemix Private Cloud Local
- Building Up to OpenStack — QEMU and Your Cloud
- Building Up to OpenStack II -- Improving Cloud Performance
- Cloud 101 -- Optimized Load Balancing
- User's Guide to Cloud Images (IBM Bluemix Private Cloud with Red Hat)
- User's Guide to Cloud Images (Community Edition)
- IBM Bluemix Private Cloud Image Release Notes
- View More ( 4 )
User Guides
-
Troubleshooting (19)
-
Open Stack (15)
-
Horizon [GUI] (10)
-
Nova [Compute] (13)
-
Neutron [Networking] (22)
-
Glance [Images] (6)
-
Cinder [Block Storage] (13)
-
Keystone [Identity] (8)
-
Heat [Orchestration] (7)
-
Ceilometer [Telemetry] (1)
Creating Additional Networks in OpenStack Using the Horizon Panel
So you’ve been handed the keys to your fresh new OpenStack cloud and you’ve specifically asked that it be set up with VXLAN because you want to segregate a dev/test environment and your production network. First, is this something you can do using security groups? No? Okay, read on.
A typical IBM Bluemix Private Cloud has an Internal and External network setup by default, with a default router (aptly named default) bridging them. To create our own network, we need to mirror this setup.
(Disclaimer: There be dragons here! Make sure you are in fact using VXLAN before you do this–it just won’t work otherwise. Also, you run the risk of suddenly ceasing earth’s rotation and flinging us all into space)
First things, first, let’s create a network. For sanity’s sake, I’ll be showing both command-line interface (CLI) and Horizon methods so as to be the most helpful. Let’s start with Horizon, I’ll do CLI in another post shortly.
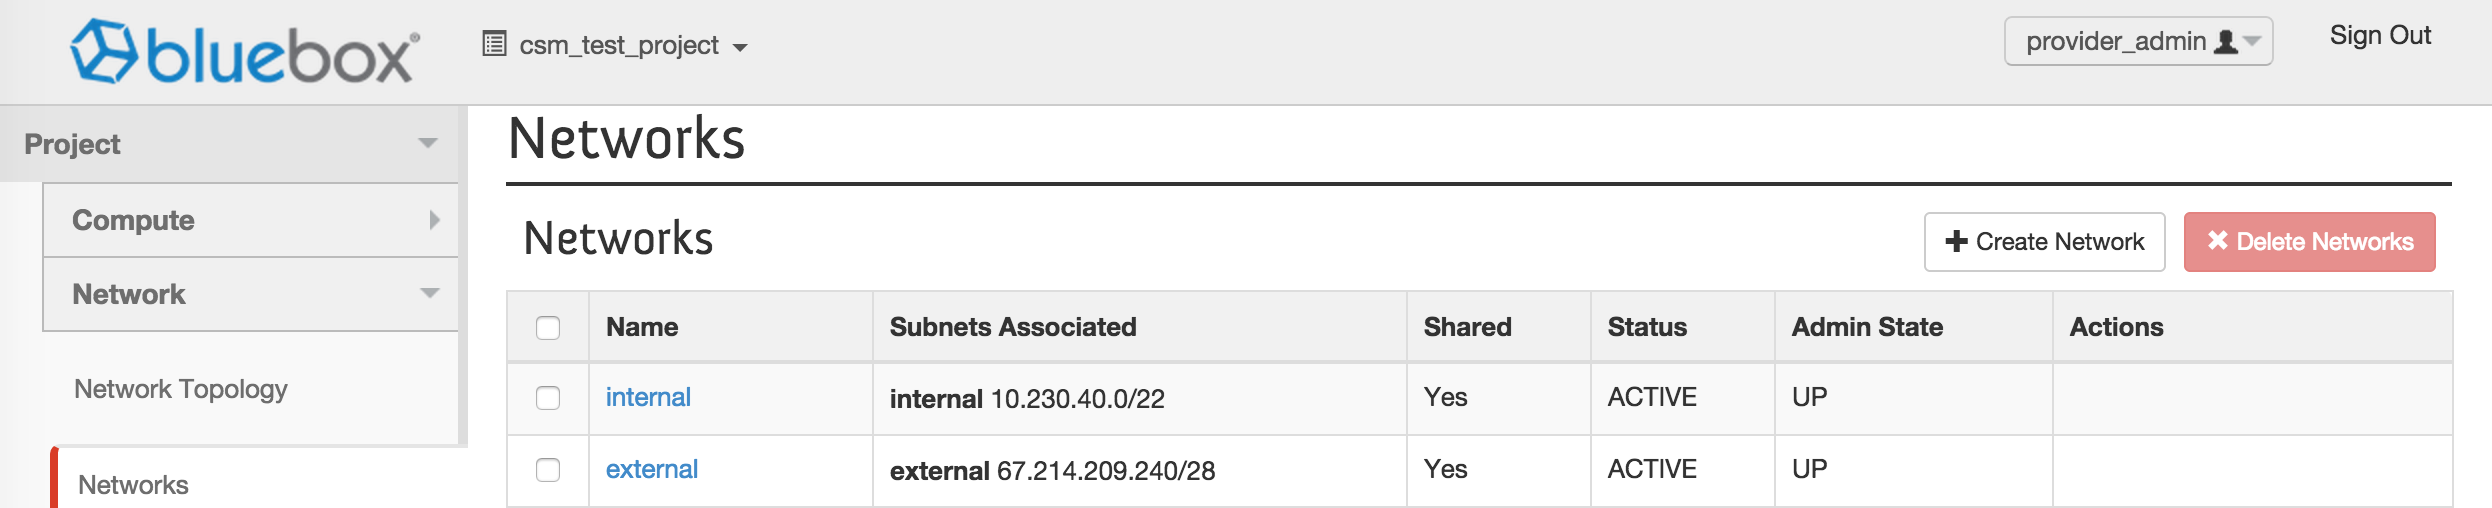
Under your Project, go to the Network tab and select Networks. You will see Internal and External as described previously.
From here, click on Create Network at the top right, to bring up the Create Network popup screen.
Plug in your Network Name (leave the Admin State as UP), and click the Subnet tab (or select Next).
Here, plug in your Subnet Name (I’m using test_subnet, and test for the Network Name itself), the Network Addresses (I’m using 192.168.10.0/28) and the Gateway IP (192.168.10.1 in my example).
Now click Subnet Detail or Next. On this screen, if you are only allocating a portion of your pool or you’d like to designate DNS servers or Host Routes, go ahead.
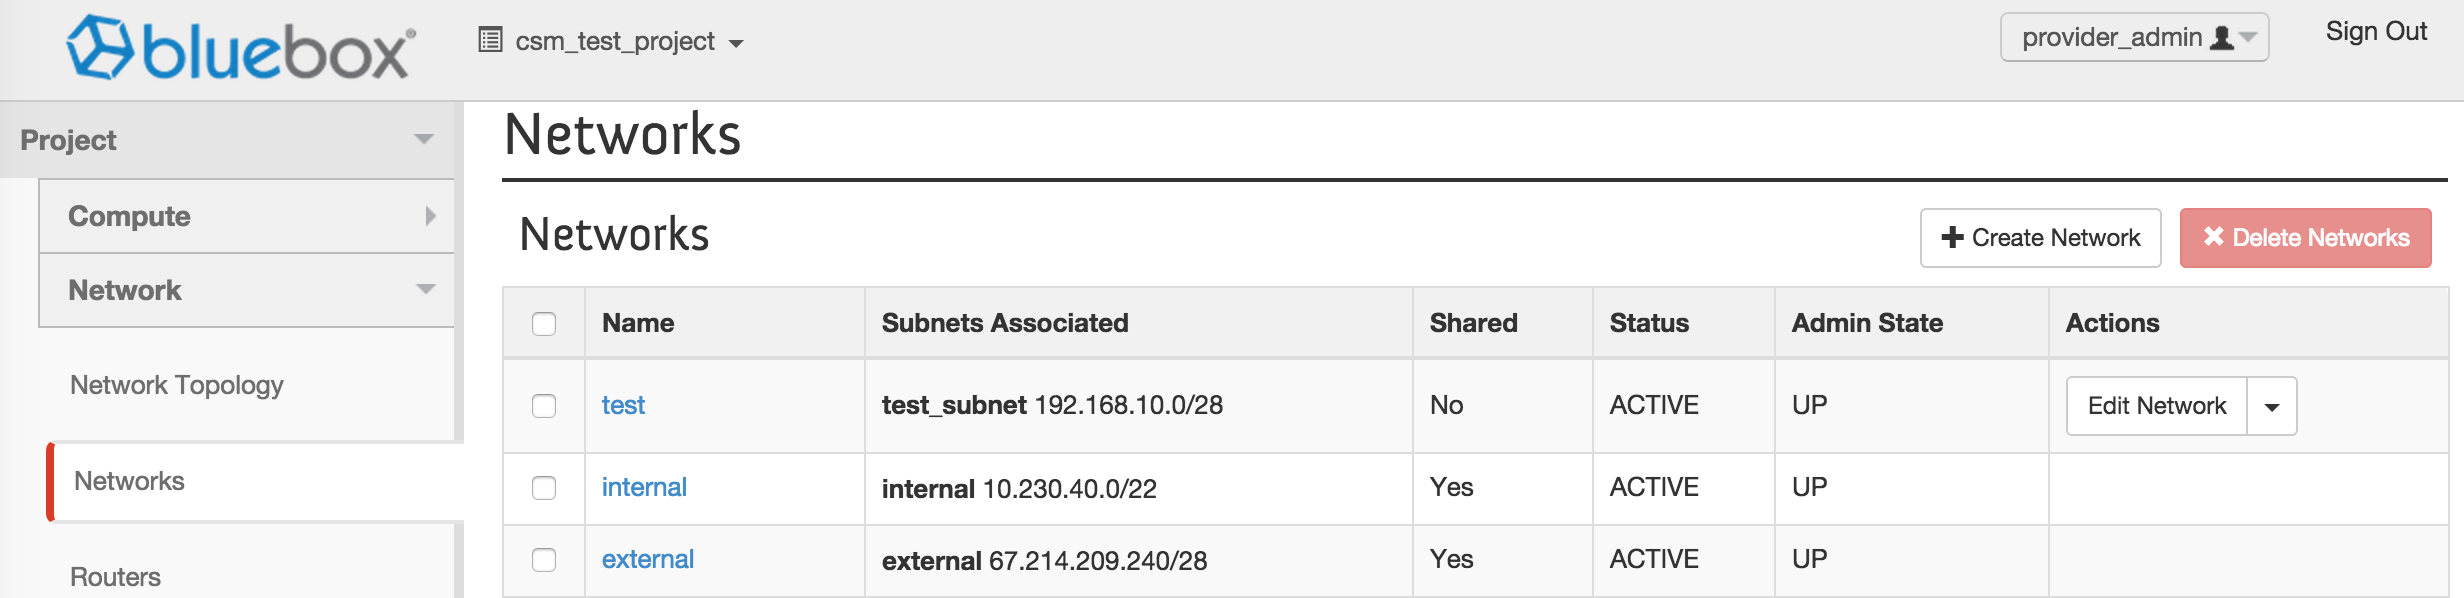
From here just click the blue Create button. Your Networks section should now look like this:
Now let’s add a router.
Click on Routers under Networks in the navigation; you shouldn’t see any routers there, so let’s make one by clicking Create Router. It’ll bring up the Create Router dialogue window. All you need to do is pick a Router Name (we’ll use test_router). Hit Create Router and you should see the following:

Looking at our router, we can see that it’s not attached to an external network, which is necessary for it to do the things that routers do. Under Actions on the right side, let’s click on Set Gateway. That brings up the Set Gateway window; under the External Network dropdown. Select External, and then hit the blue Set Gateway button. Your gateway is now attached to the External network.
From here, we can take a step back and examine what we’ve done so far. If you click on Network Topology on the left, you’ll see now that your network exists, as does the router you created. That router is attached to the External network, as planned. The only piece that’s missing now is to attach this router to your network, so it’ll route your instance traffic. If you hover your mouse over your router, you can see some details about it from the Network Topology section, including the ability to Add Interface and Delete Router. Adding an interface is what we want to do, but let’s go the long way:
Click Routers on the left and then click on your router. You should now be in the Router Details screen, as shown:
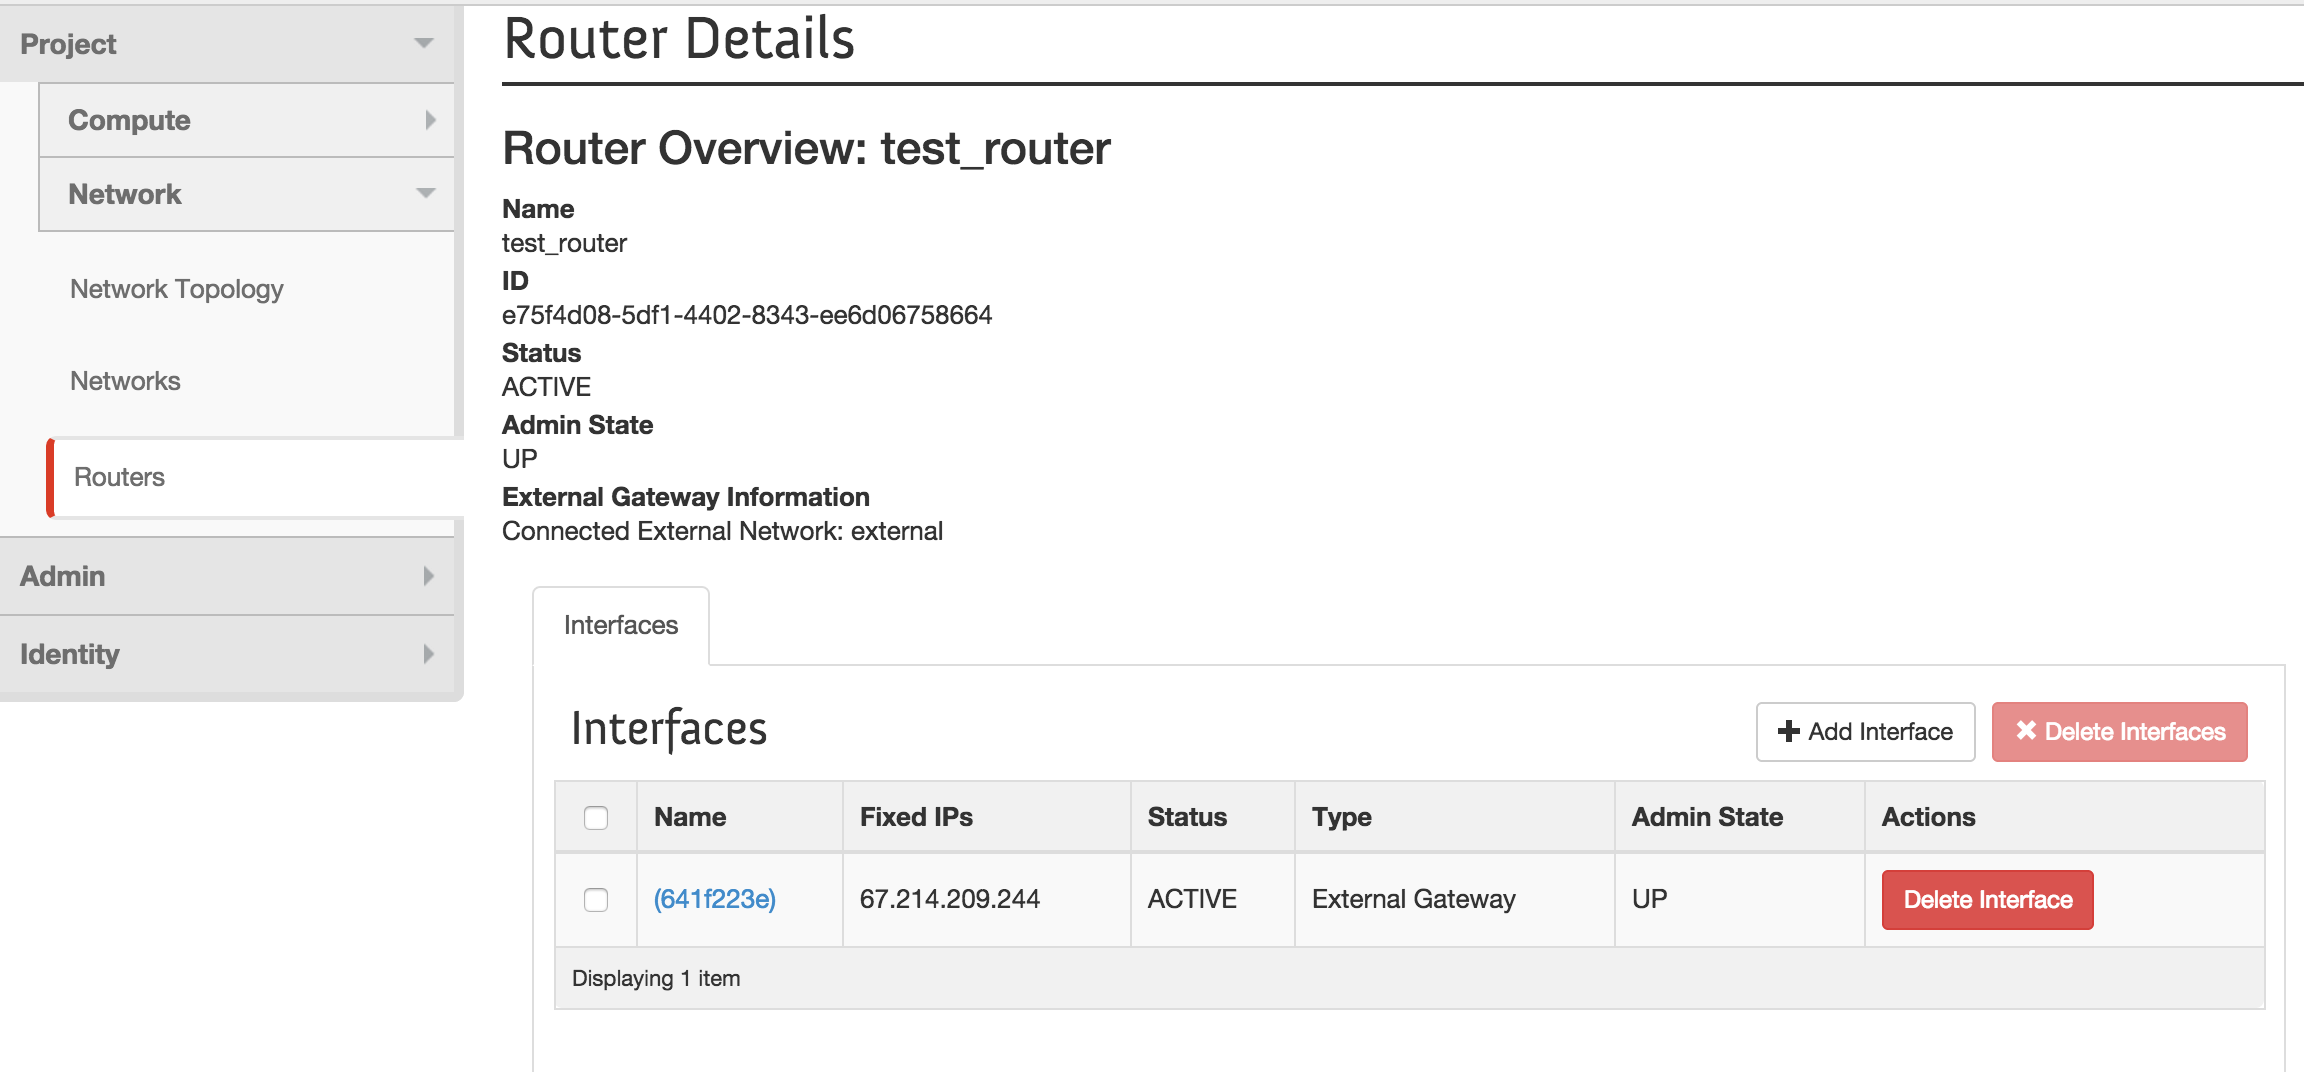
This screen provides a lot of information about our router, and we can see that our External gateway interface has been added. Let’s click Add Interface, to bring up the Add Interface dialogue box. In the Subnet dropdown, select the network you created. Optionally, you can assign this interface an IP or let the cloud do so. We’ll leave IP Address blank and let it be assigned. Click the blue Add Interface button to finish.
Before continuing, this is a good place to add some information about interfaces and IP addresses. Each interface you add to a network requires an IP; attaching your router to the External network required an IP address; you can see that above as your External Gateway interface has a Fixed IP in your Floating IP range. The Internal Interface you just created should have its own fixed IP from the Internal network pool you created. Note the Status initially will be DOWN, but it will flip to ACTIVE once it’s complete.
From here, if we go back into Network Topology on the left, we should see a connection between the External network and the one we created, via the router we created and hooked to each network. We should now be able to start an instance on this network and have it be reachable externally once we assign it a floating IP.
From Compute under your Project, click on Instances. On the right side, click on Launch Instance, which will bring up the Launch Instance dialogue window. Plug in an Instance Name (test_instance in this case), and select Boot From Image from the Instance Boot Source dropdown. We’re going to create a simple Cirros instance, so select Cirros (12.6MB) from the Image Name dropdown.
Now click Access & Security in blue at the top. You should already have a keypair; make sure it’s selected. Also make sure you’re using the appropriate security group, and hit the next blue section at the top, Networking.
Here we select our test network. Click Launch. You should see something similar to the following:
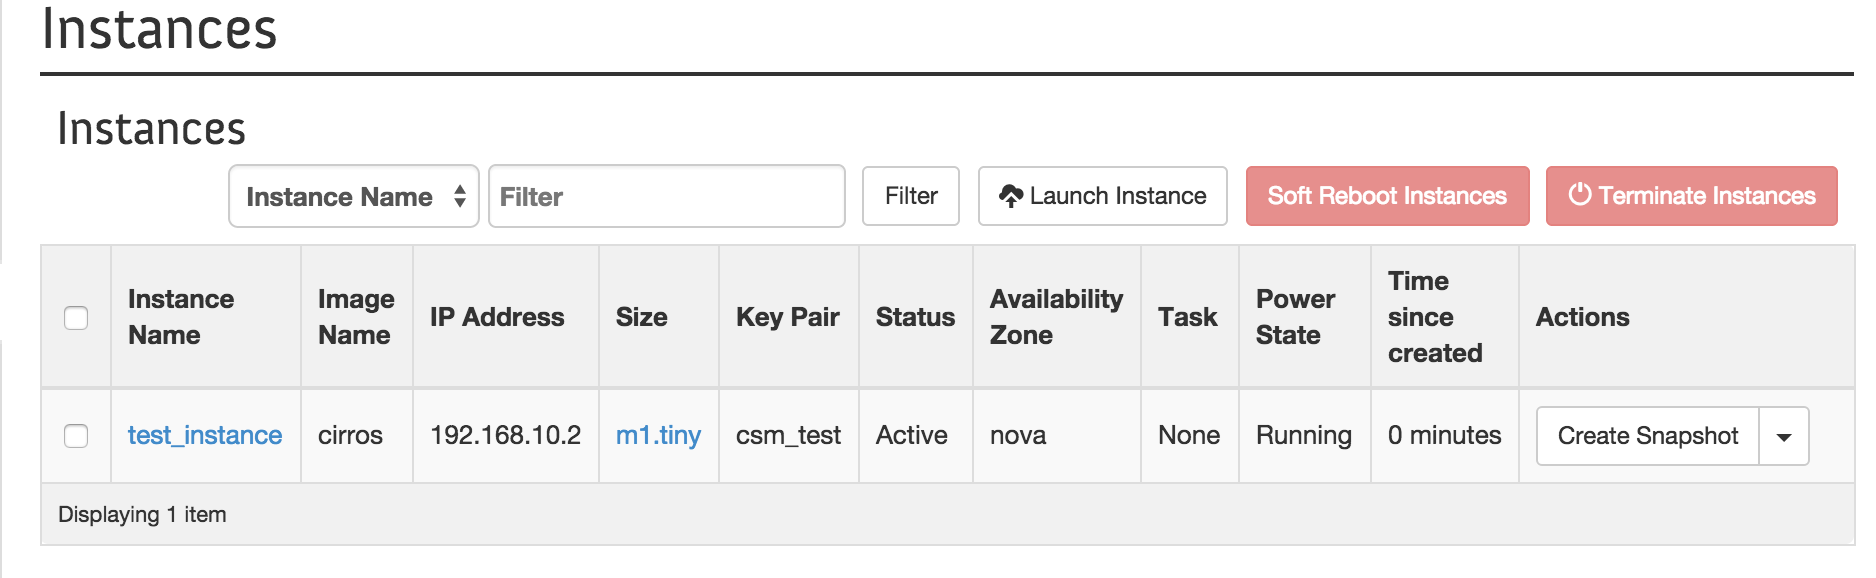
Notice that the IP address 192.168.10.1 is being used for the Internal interface gateway on our router, so it’s unavailable for use on instances. Click on the instance name to go into the Overview. From here click on the Console tab. When that comes up, click on the darker blue section that says “Connected” and hit enter, you should be at a login prompt. Log into the instance using the default Cirros login: cirros username, password cubswin:)
You should be able to ping an outside address, and look at your IP. All we need to do now is assign it a floating IP.
On the right under Actions select Associate Floating IP, which will open the Manage Floating IP Associations dialogue box. If this is the first time you’re associating an IP, you will have to select the ‘+’ icon next to the drop down, because the list will be empty. Select External from the Pool and hit the blue Allocate IP, then Associate. You should now see two IP addresses associated to your instance.
You should now be able to ssh into your instance using its floating IP and your associated key, into an instance on your own network, using your own router.