

-
Getting Started (38)

-
Troubleshooting (19)
-
Open Stack (15)
-
Horizon [GUI] (10)
- Creating Additional Networks in OpenStack Using the Horizon Panel
- Using Horizon for Snapshots
- Allocating and Attaching a Public (Floating) IP to an Instance
- Creating a volume from the Horizon dashboard
- Horizon for Administrators
- Launching an instance from the Horizon dashboard
- Launching an instance from the Horizon dashboard (OpenStack Newton release)
- How do I set a reverse DNS (PTR) record for an IBM Bluemix Private Cloud instance?
- Using Horizon
- Horizon Troubleshooting FAQ
-
Nova [Compute] (13)
-
Neutron [Networking] (22)
-
Glance [Images] (6)
-
Cinder [Block Storage] (13)
-
Keystone [Identity] (8)
-
Heat [Orchestration] (7)
-
Ceilometer [Telemetry] (1)
Launching an instance from the Horizon dashboard (OpenStack Newton release)
Steps
- Log in to the Horizon dashboard.
- Under the Project topic, expand Compute and click Instances. If you have existing instances, you can view a list of your instances with their details, such as name, IP address, and status. For information about managing your instances, please see How to manage your instances.
- Click Launch Instance on the upper right portion of the Horizon dashboard. The Launch Instance dialog is displayed.
Navigate through the following tabs and provide the values, then click Launch Instance on the lower right side of the dialog box.
Fill in values in the Launch Instance dialog box
The Details tab
| Values | Description |
|---|---|
| Instance Name | Assign a name to your virtual machine. The name that you assign here becomes the initial host name of the server. Server names are not guaranteed to be unique when created, thus you could have two instances with the same host name. |
| Availability Zone | By default, this value is set to the Availability Zone (AZ) given by the cloud provider, for example, compute_standard. |
| Count | To launch multiple instances, enter a value greater than 1. The default is 1. |
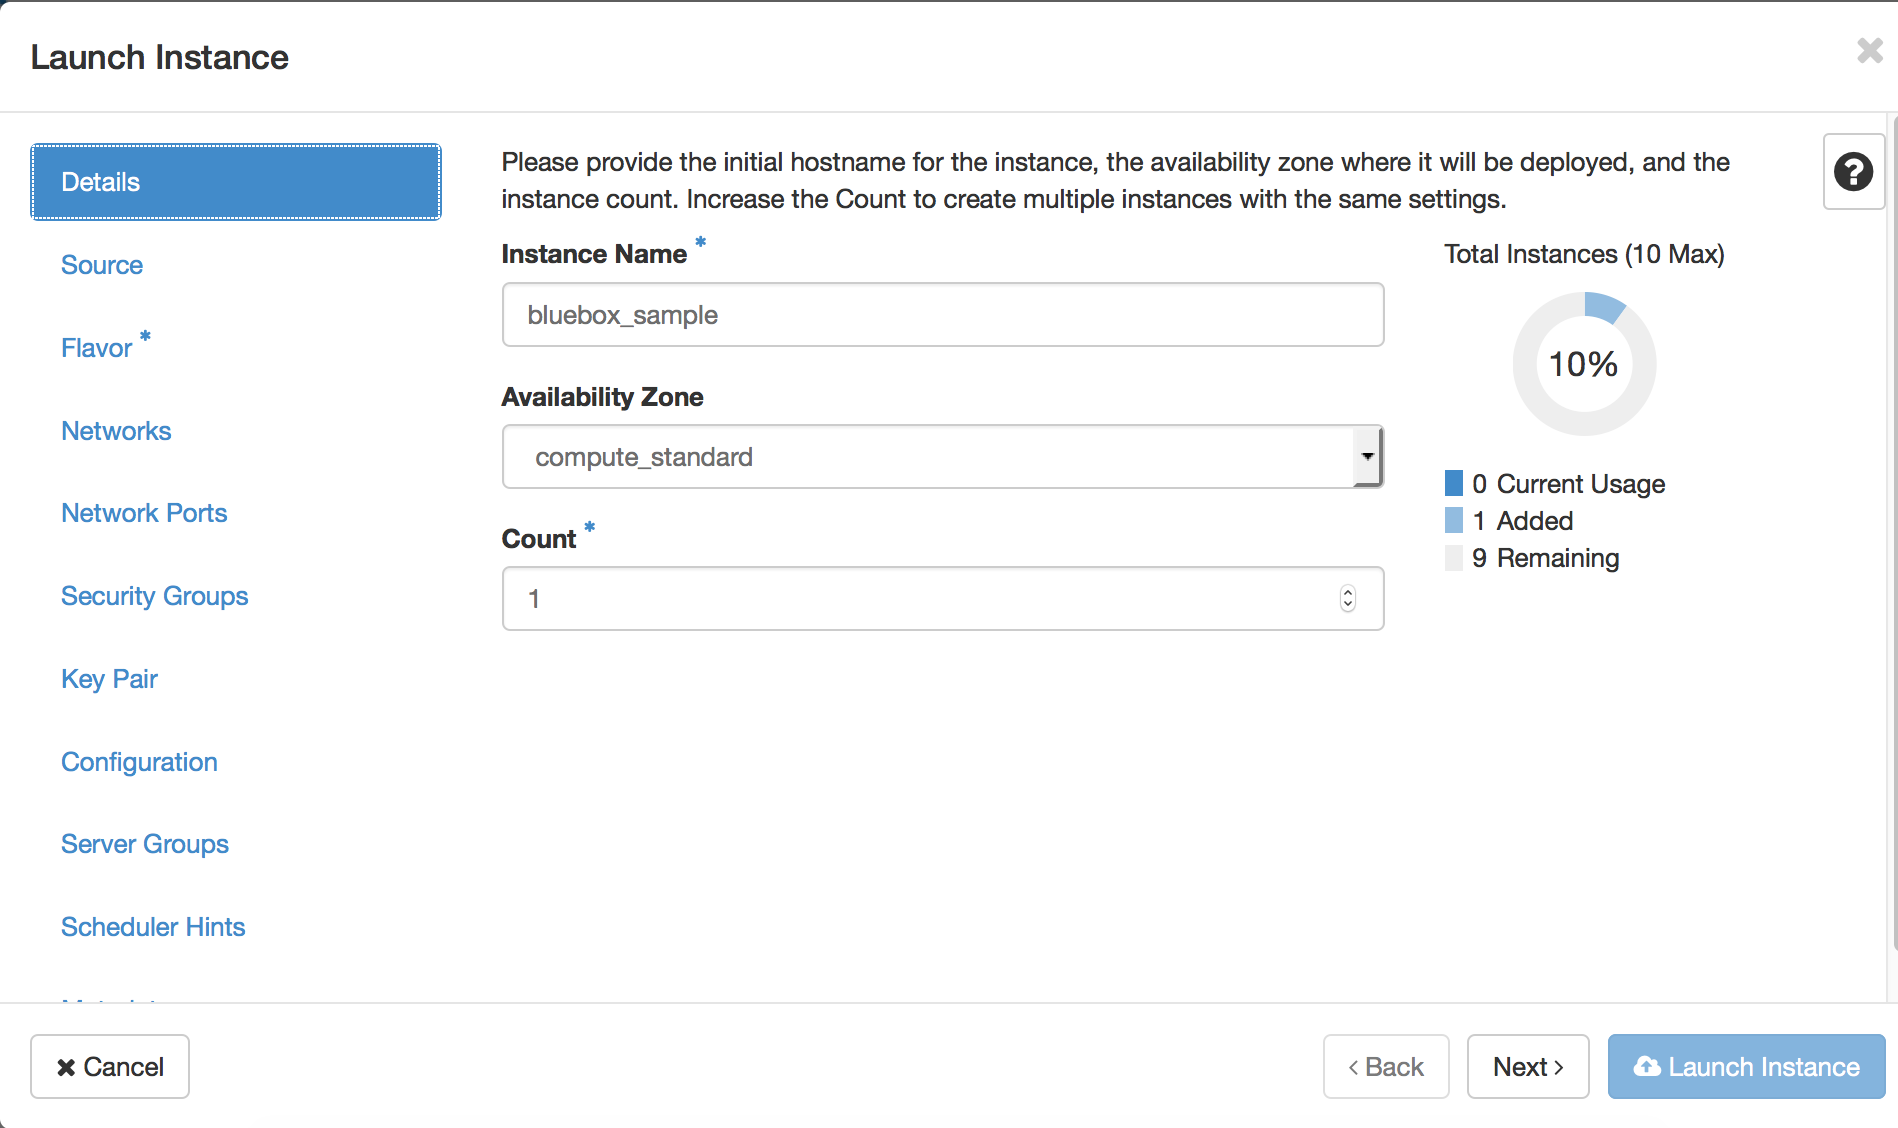
To continue, click Next or click on the Source tab.
The Source tab
The Select Boot Source field offers these options:
| Options | Description |
|---|---|
| Image | Make a selection from the list of private and public images in the Available table, then click the plus sign (+) to move it to Allocated. Optionally, you can click Yes on Create New Volume to enable more volume creation options. If you’ve created a new volume with this instance, you can click Yes on the Delete Volume on Instance Delete option if you want to delete this volume when the instance is terminated. |
| Instance Snapshot | Make a selection from the snapshots in the Available table, and click the plus sign (+) to move it to Allocated. |
| Volume | Make a selection from the volumes in the Available table, then click the plus sign (+) to move it to Allocated. Optionally, you can click Yes on the Delete Volume on Instance Delete option to delete this volume when the instance is terminated. |
| Volume Snapshot | Make a selection from the volume snapshots in the Available table, then click the plus sign (+) to move it to Allocated. Optionally, you can click Yes on the Delete Volume on Instance Delete option to delete this volume when the instance is terminated. |
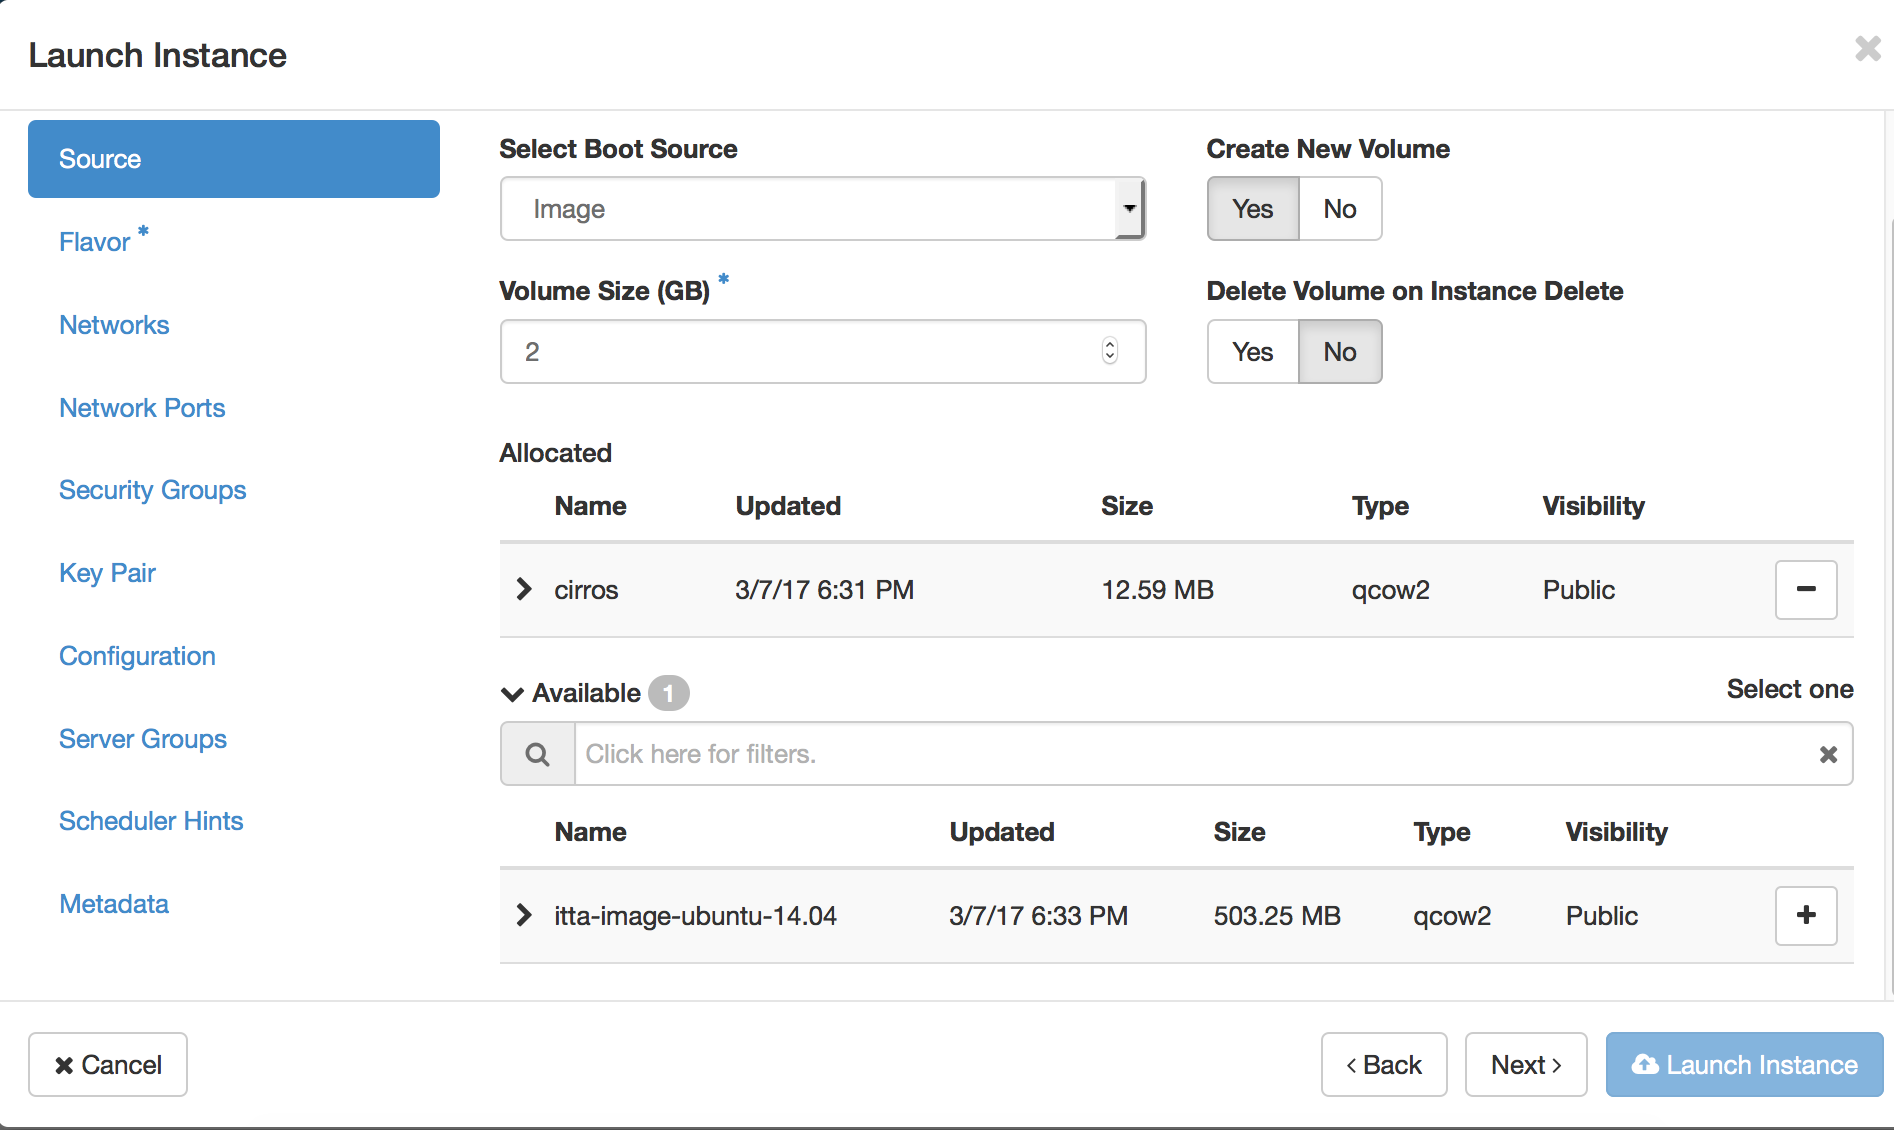
Note: The Image option is set by default, so you don’t have to select one before booting. If you use the Image option, you can select from the public images provided by IBM, or you can upload and use your own image. For information about how to upload an image to IBM Bluemix Private Cloud, see Cloud images provided by IBM Bluemix Private Cloud.
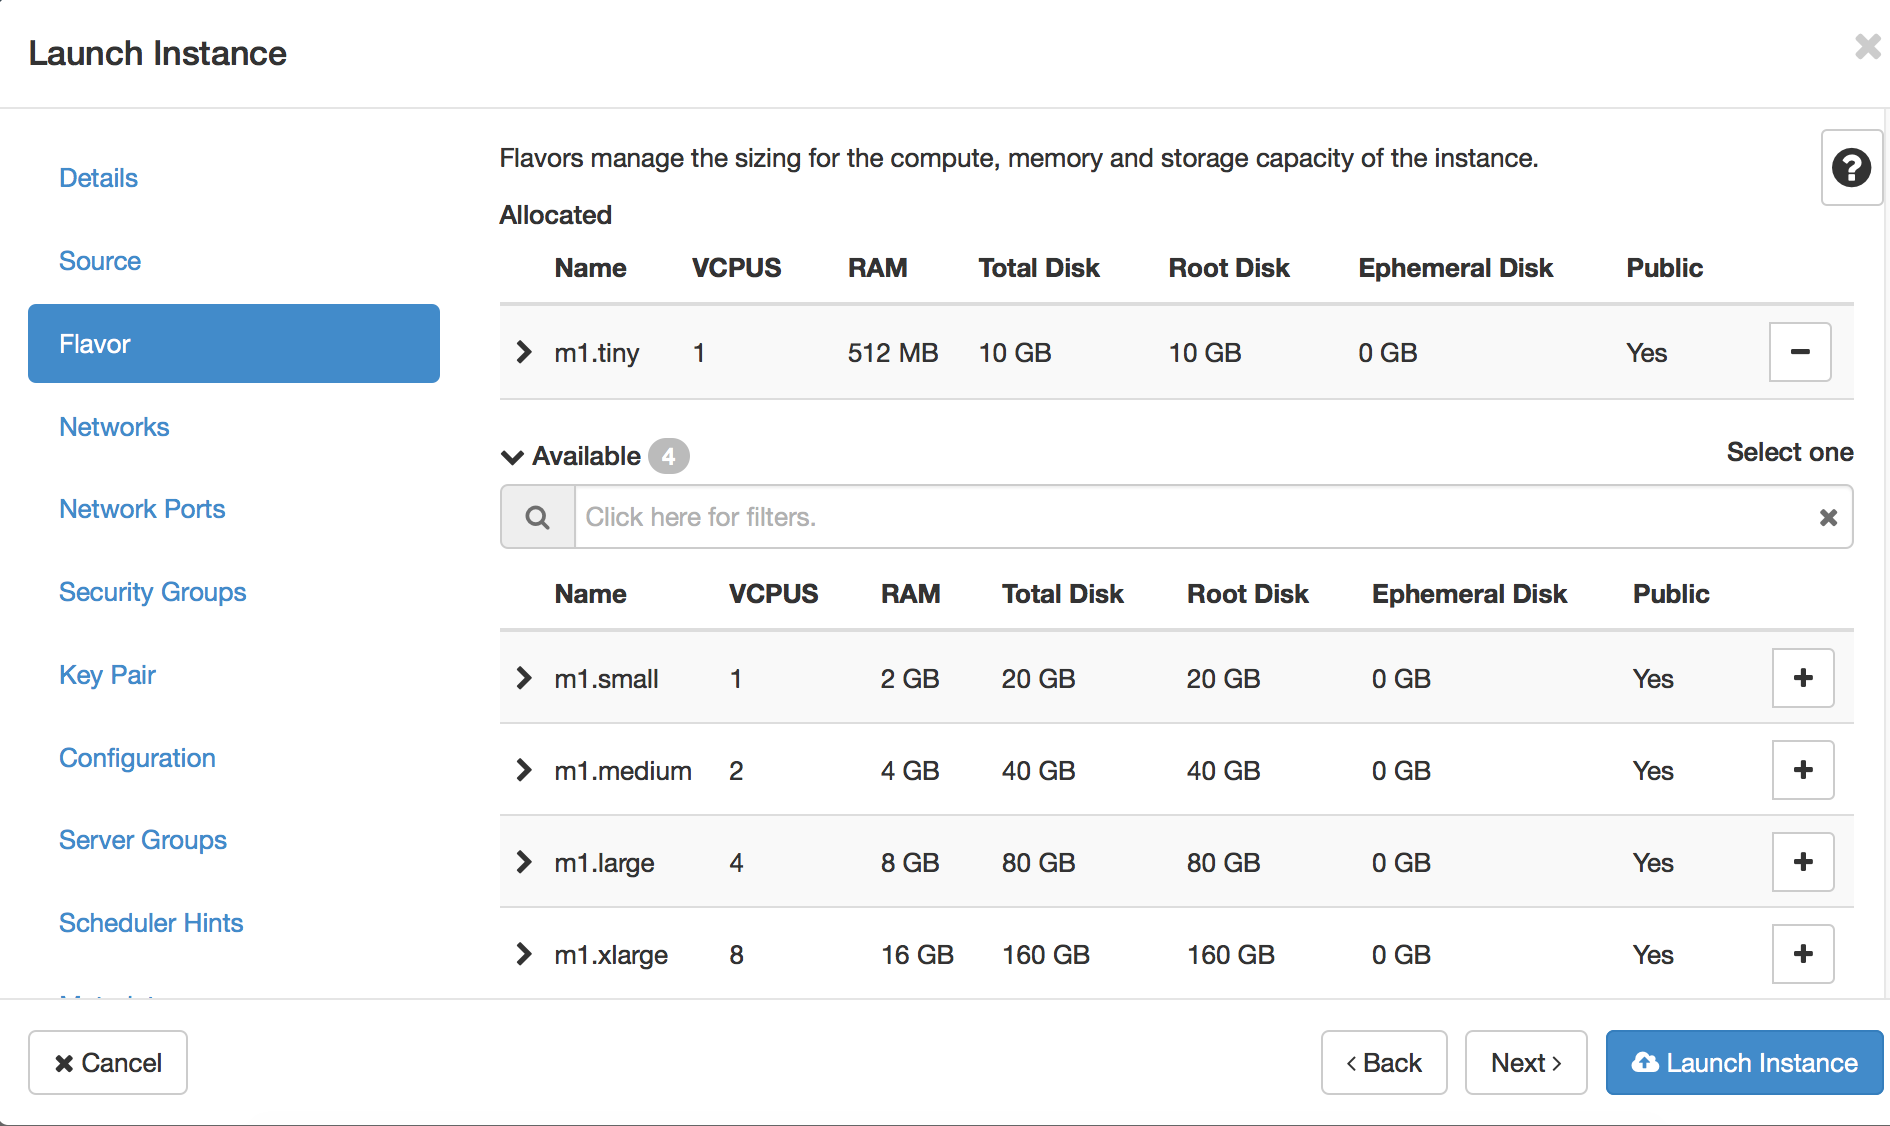
The Flavor tab
Make a selection from the list of flavors, then click the plus sign (+) to move it to Allocated.
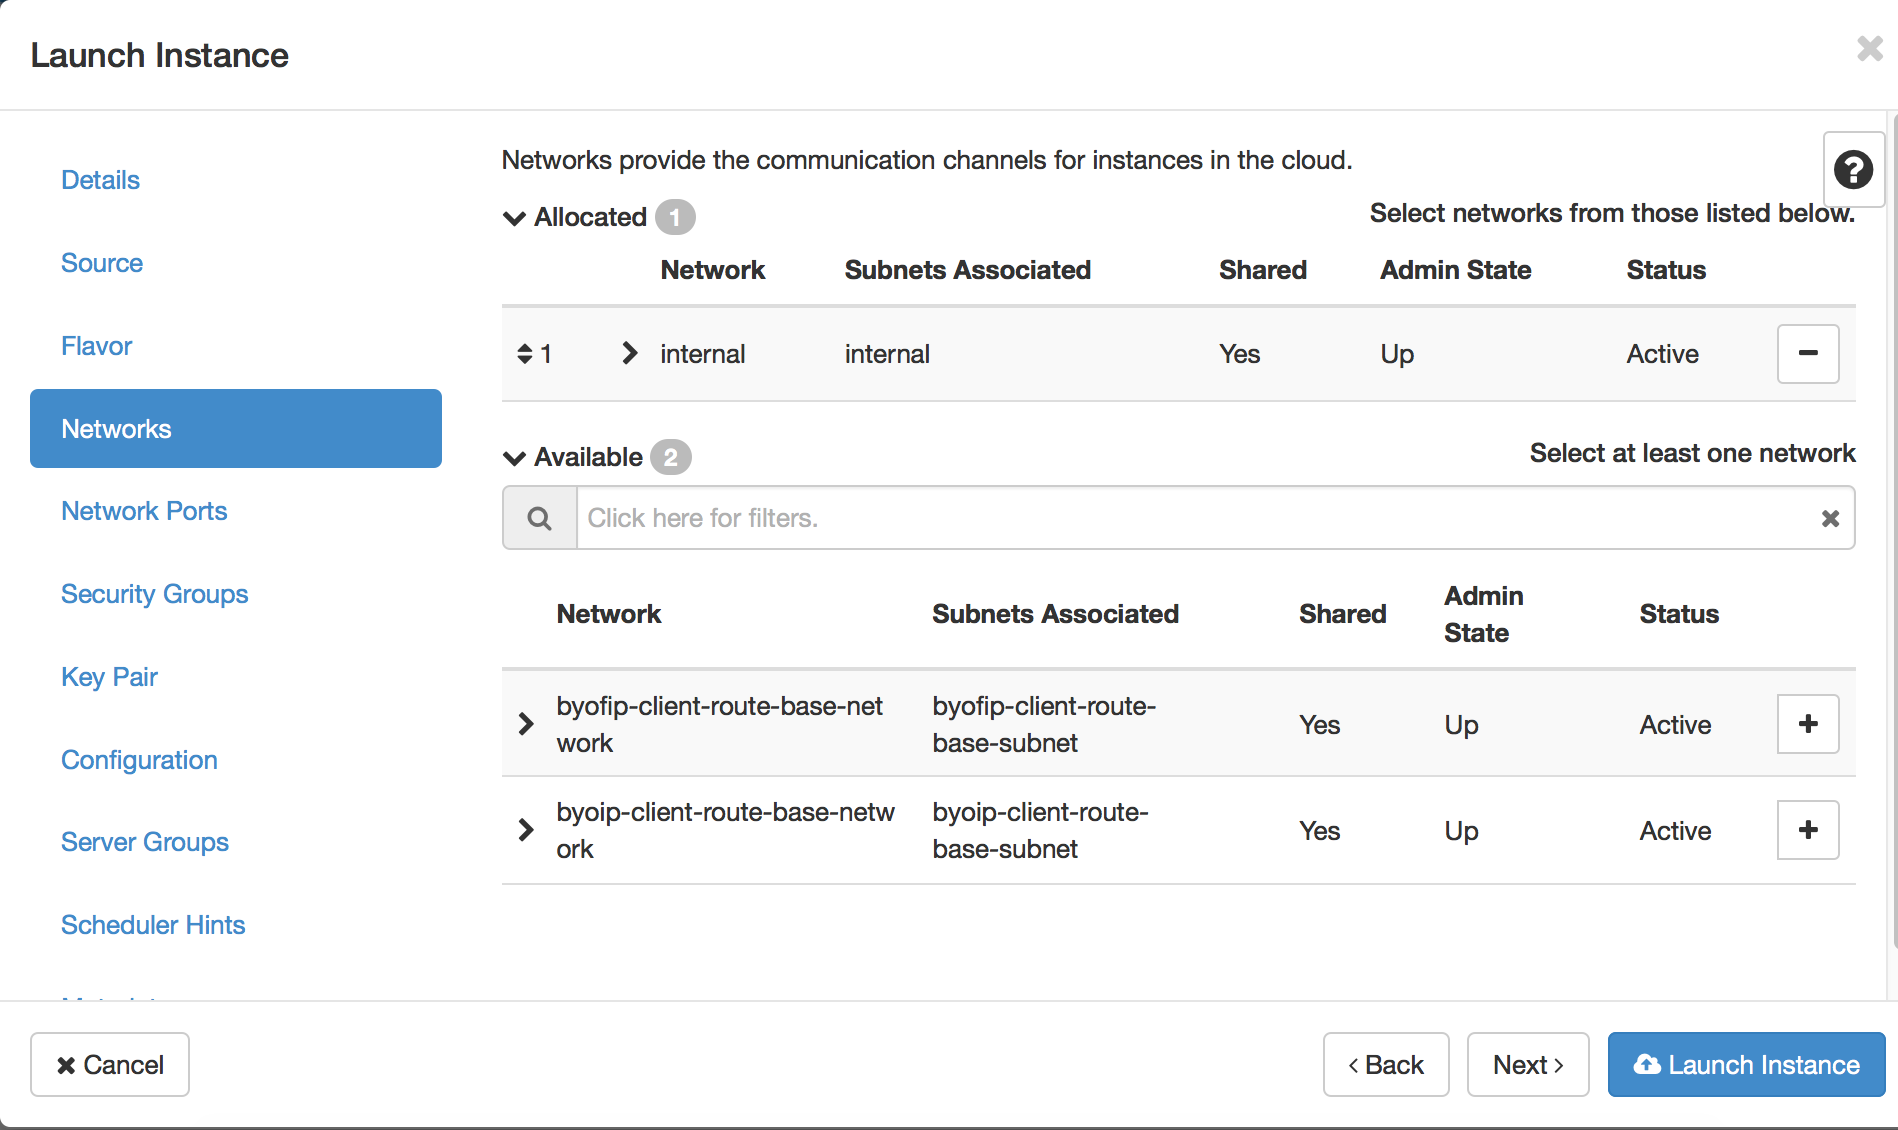
The Networks tab
Make a selection from the list of networks, then click the plus sign (+) to move it to Allocated. You can allocate multiple networks to the instance.
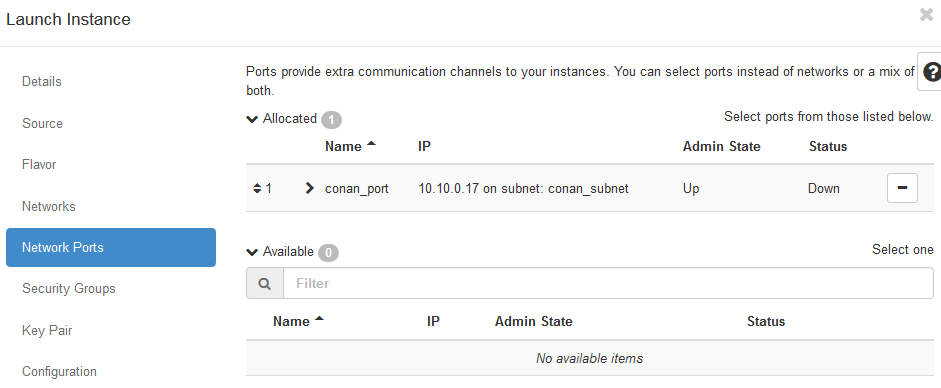
The Network Ports tab
If you do not specify any network port, a default one is assigned to the instance when the instance is created and booted.
Occasionally, you may need to create ports beforehand through APIs. After you create a port and associate it with one of the networks that you’ve selected in the Networks tab, you’ll be able to view this port in the Available table. You can click the plus sign (+) to move it to Allocated.
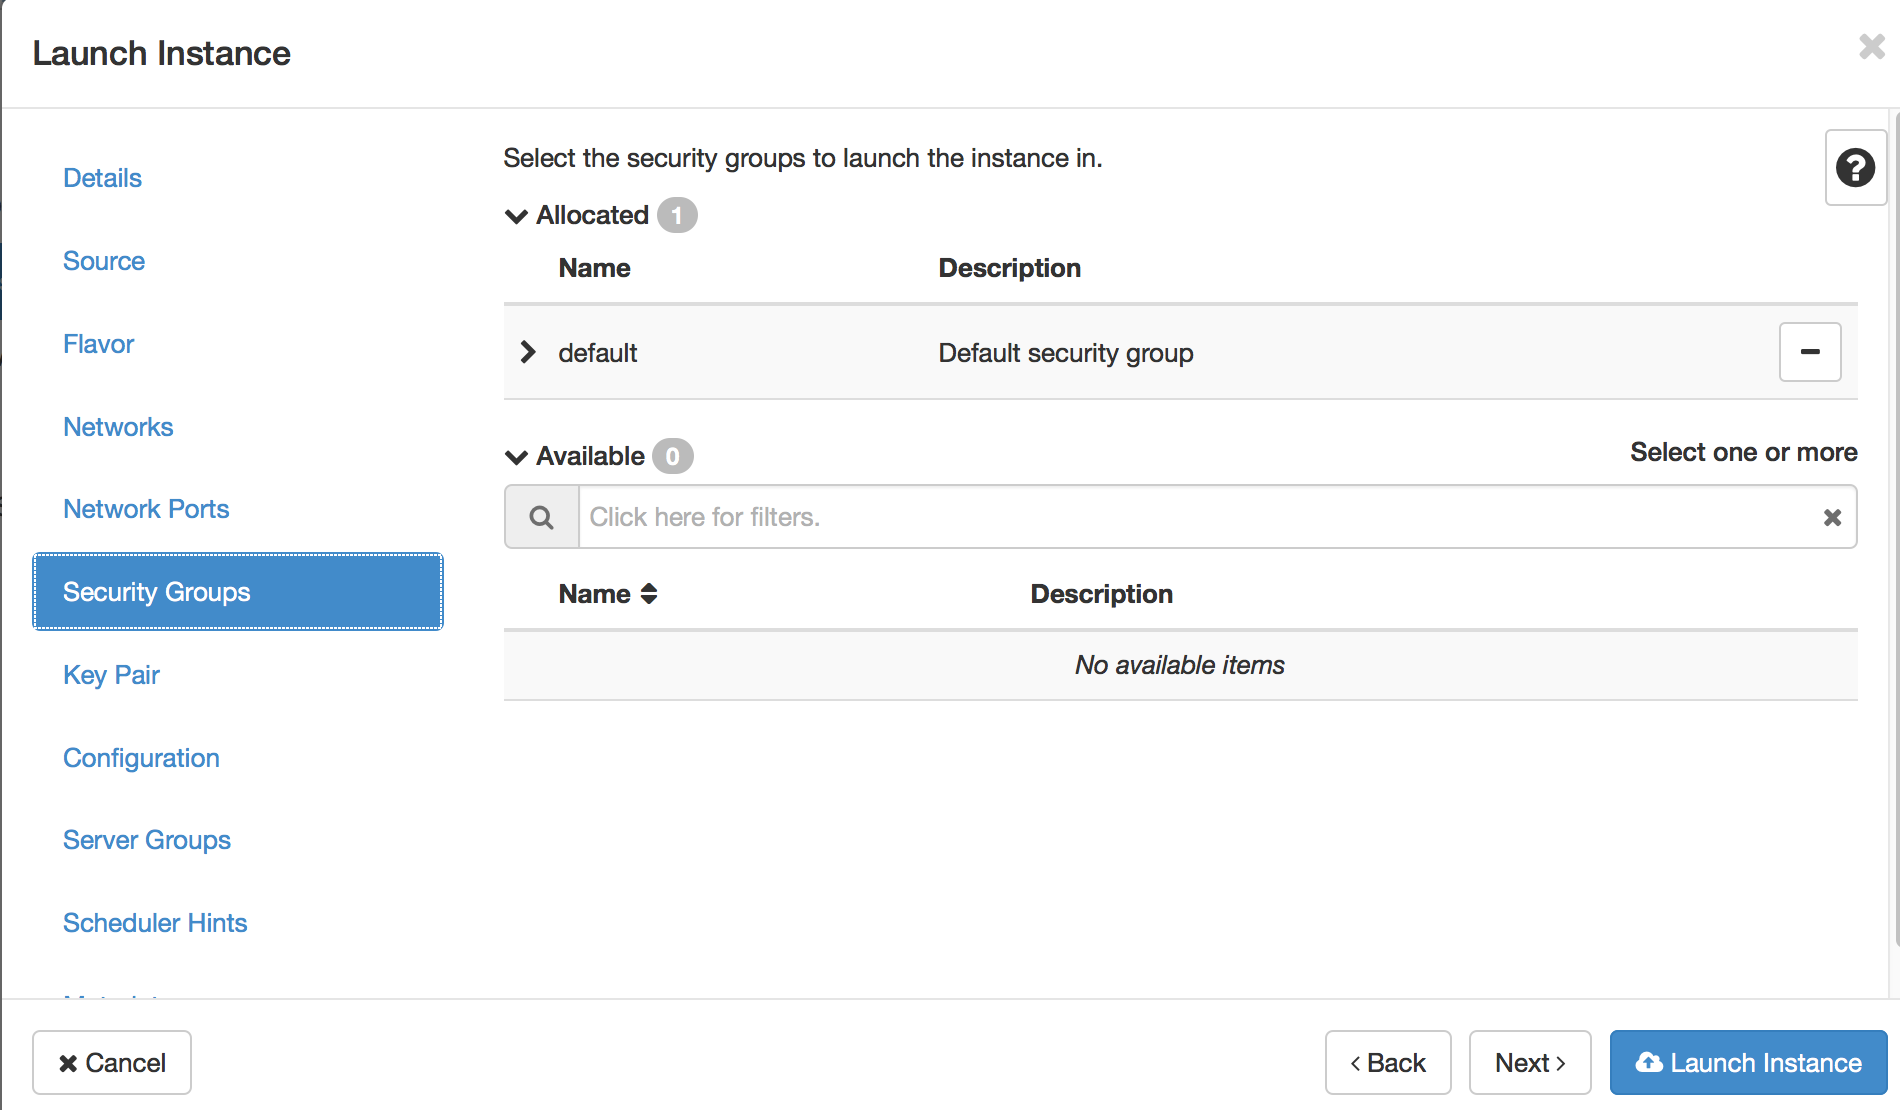
The Security Groups tab
Make a selection from the list of security groups, then click the plus sign (+) to move it to Allocated.
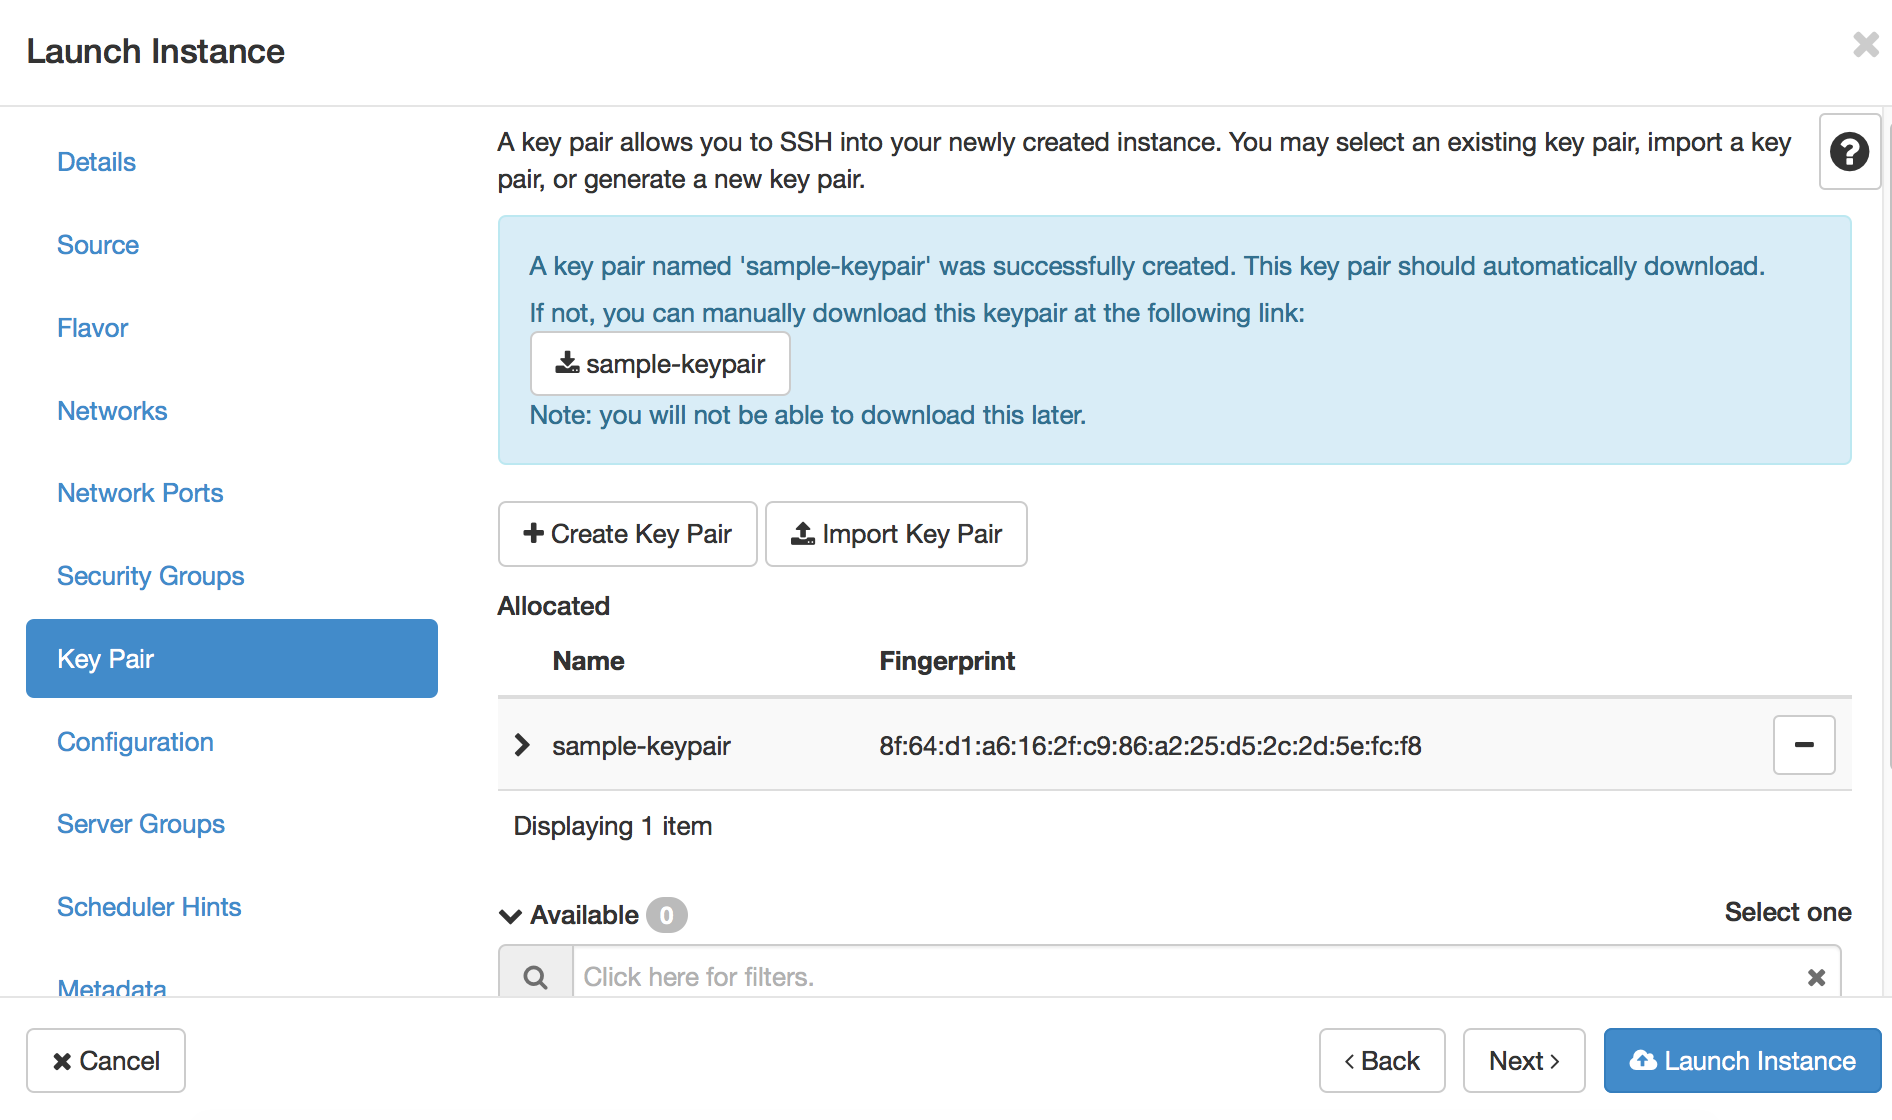
The Key Pair tab
Specify a key pair. You have the following options:
- Select from a list of stored key pairs, then click the plus sign (+) to move your selection to Allocated.
- Click Import Key Pair to import your own key pair. Copy and paste your public key, then click Import Key Pair.
-
Click Create Key Pair to create and store a new key pair. Specify the key pair name, then click Create Key Pair.
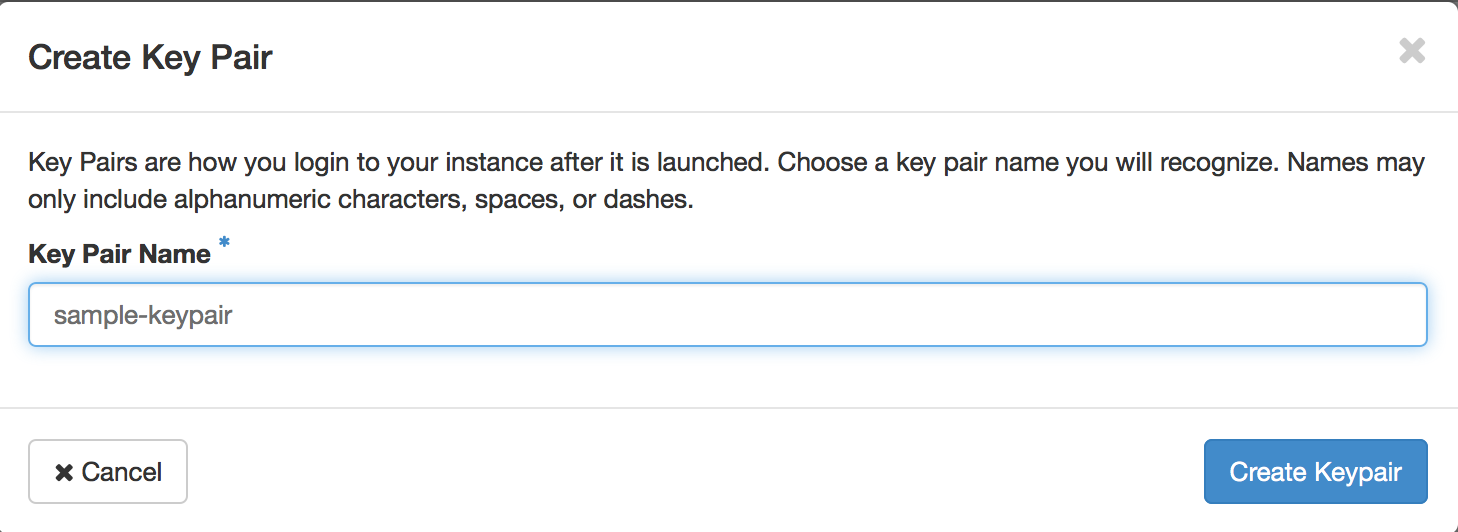
You’ll be promoted to save the new key pair to the local host.
The Configuration tab
Custom scripts attached to instances can perform specific actions when the instance is launched. You can type your script directly into the Customization Script field.
For Linux instances: The default username is ibmcloud. To enable password authentication through console and SSH, use the following script data for the Customization Script (substitute the relevant password in place of <YOUR_PASSWORD>):
#cloud-config password: <YOUR_PASSWORD> chpasswd: { expire: False } ssh_pwauth: True
For Windows instances: To set up your initial username and password, use the following script data for the Customization Script (substitute the relevant username and password in place of <YOUR_USERNAME> and <YOUR_PASSWORD>).
rem cmd
net user <YOUR_USERNAME> <YOUR_PASSWORD> /logonpasswordchg:yes /add /y
net localgroup administrators <YOUR_USERNAME> /add
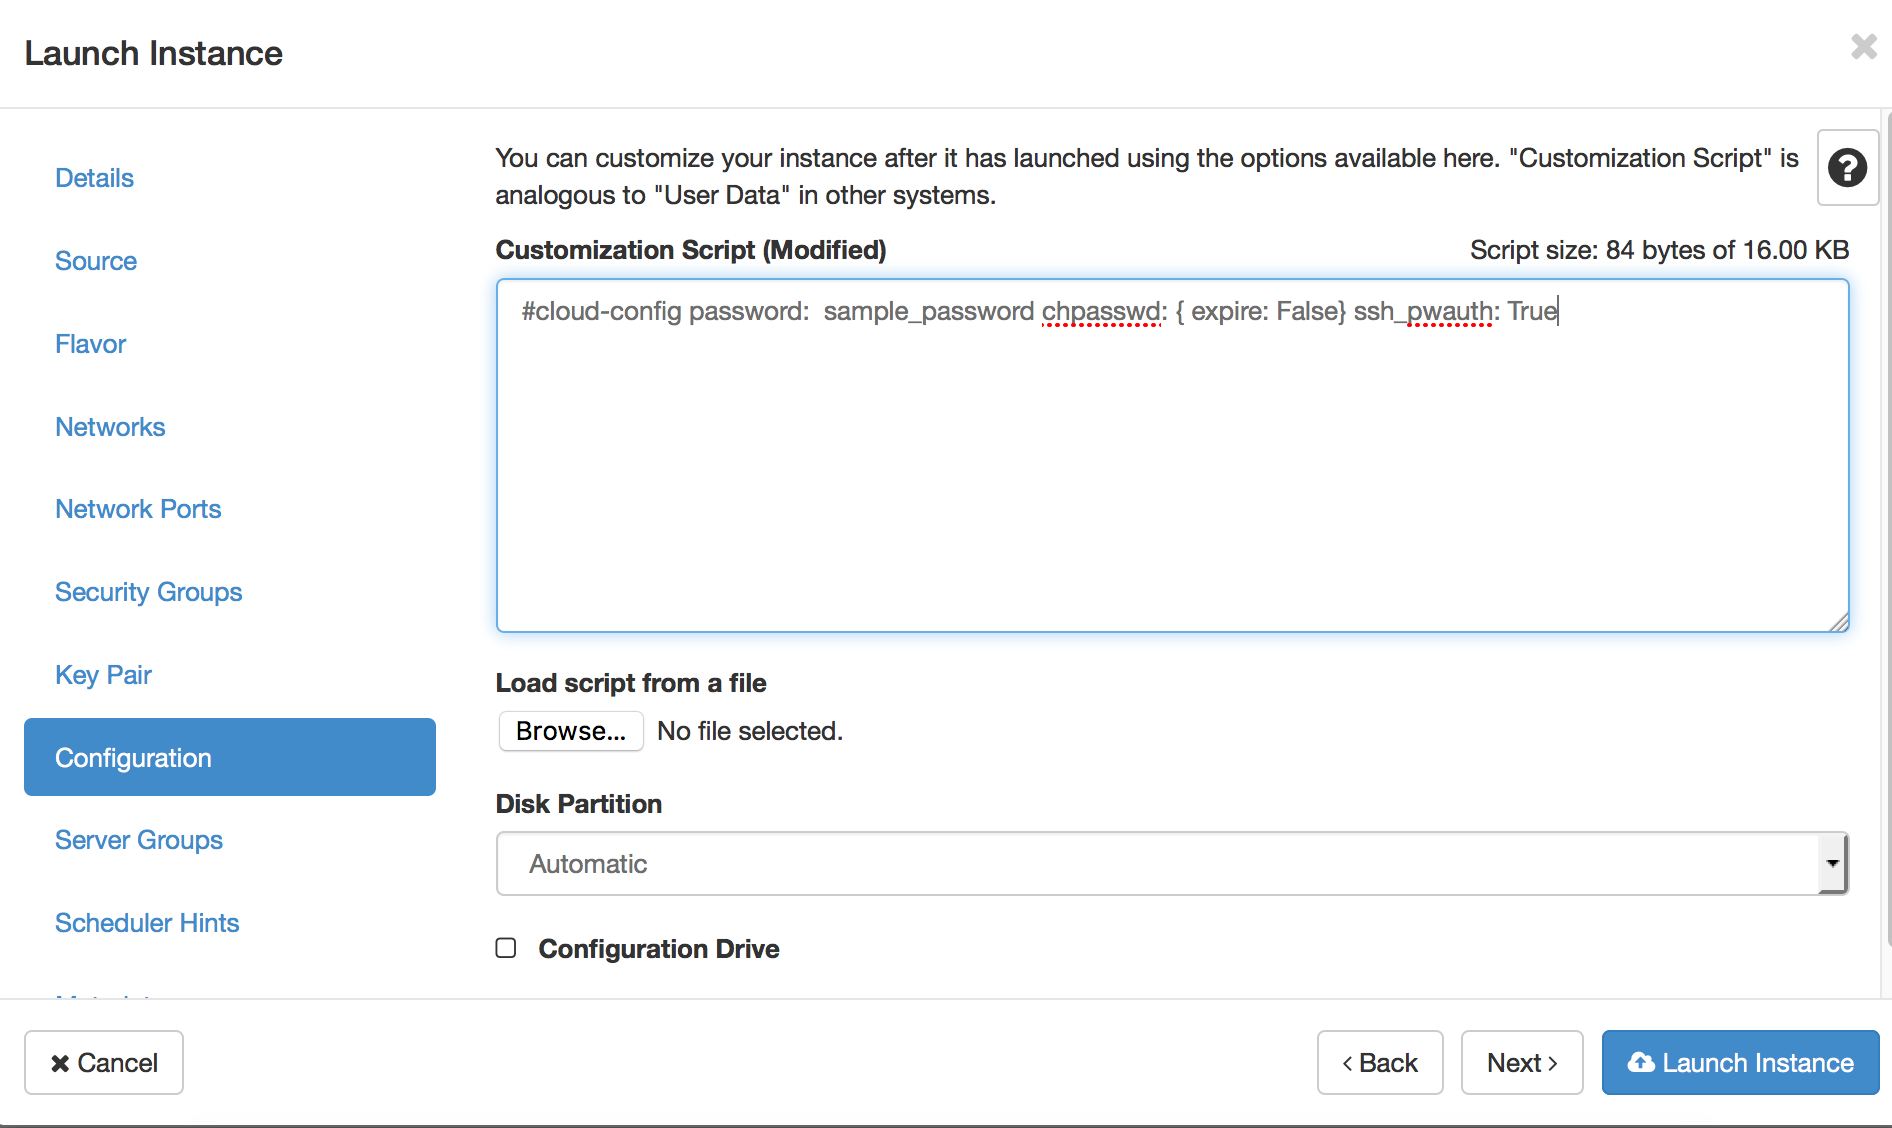
If your browser supports the HTML5 File API, you may click Browse to load your script from a file. The size of your script should not exceed 16 Kb.
In the Disk Partition drop-down menu, you can select Automatic to resize the disk and set it to a single partition, or you can select Manual to create multiple partitions on the disk.
Select the Configuration Drive checkbox if you want to write metadata to a special configuration drive, then specify your metadata in the Metadata tab. When the instance boots, it attaches to the configuration drive for access to your metadata.
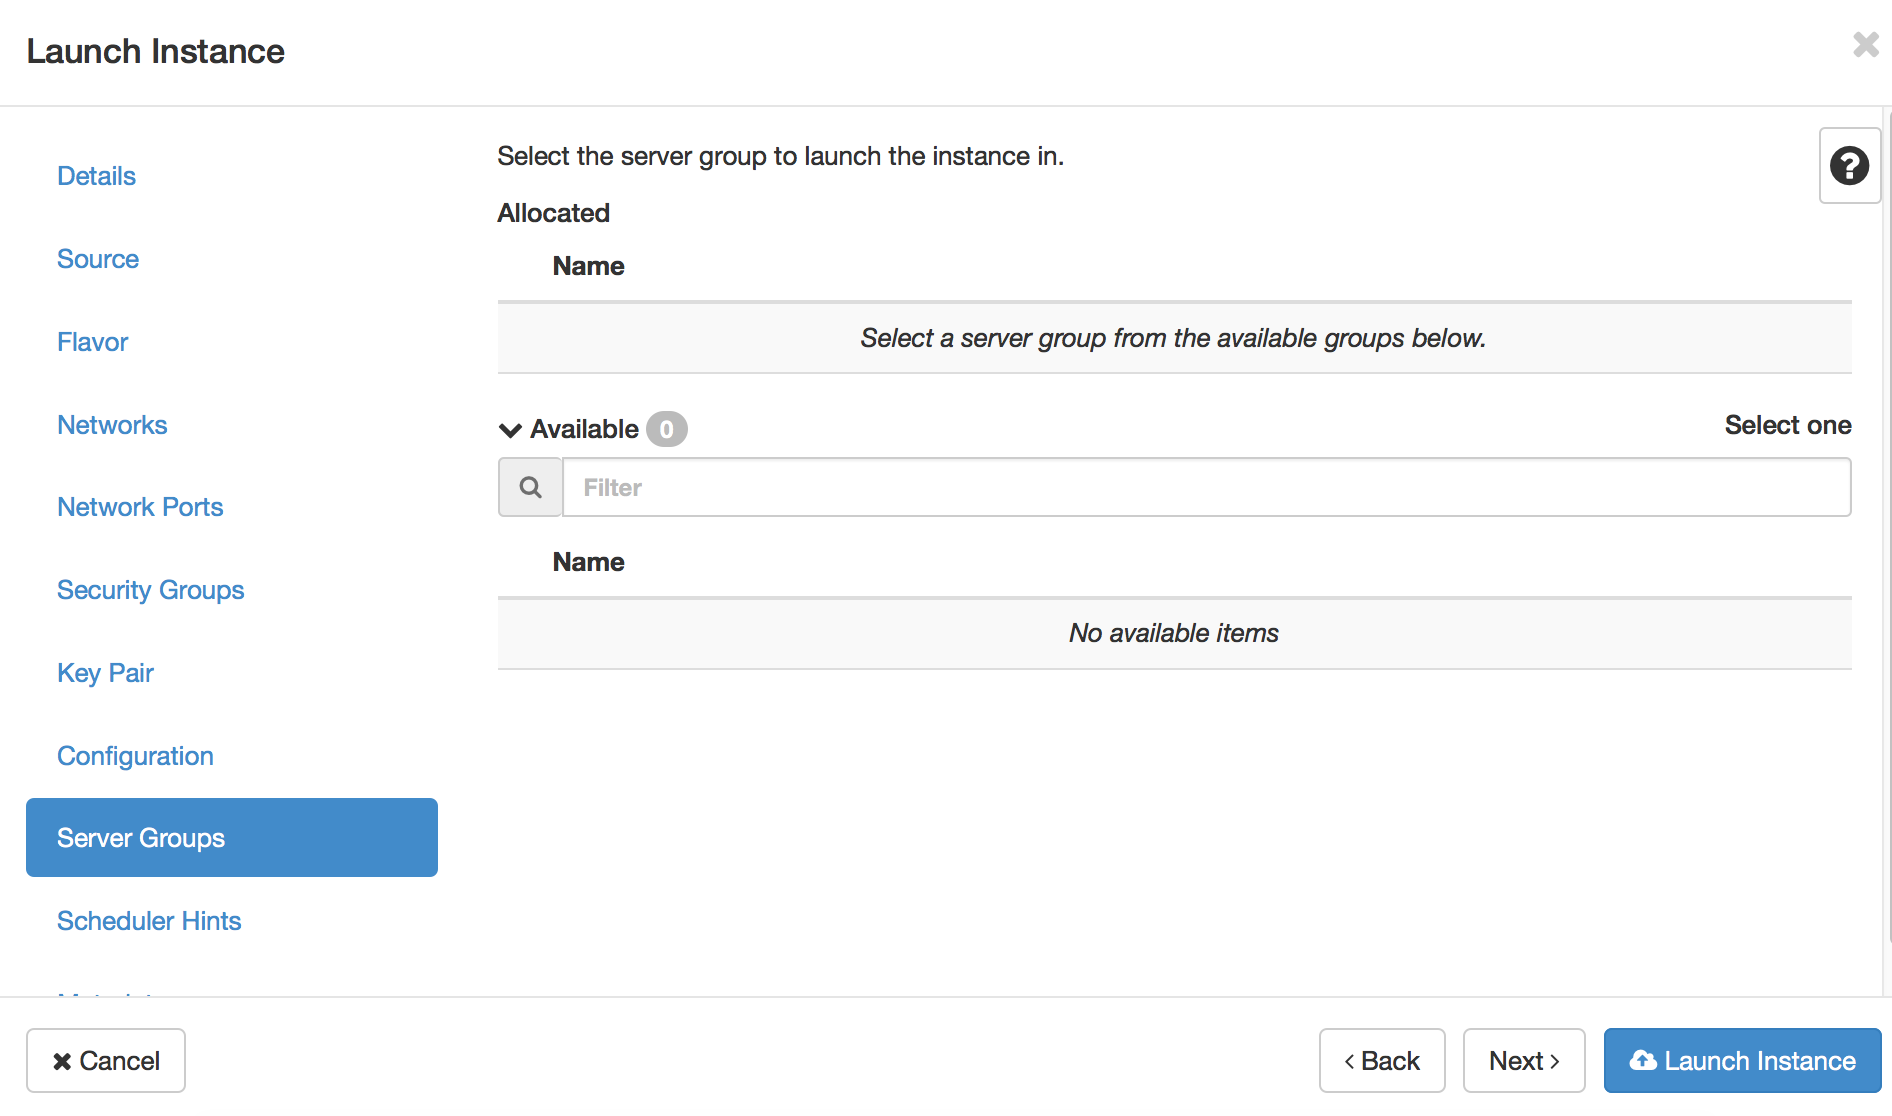
The Server Groups tab
Server groups can be used to control the affinity and anti-affinity scheduling policy for a group of servers (instances).
Occasionally, you may need to create server groups beforehand through APIs. After you create a server group you’ll be able to view this server group in the Available table. You can click the plus sign (+) to move it to Allocated.
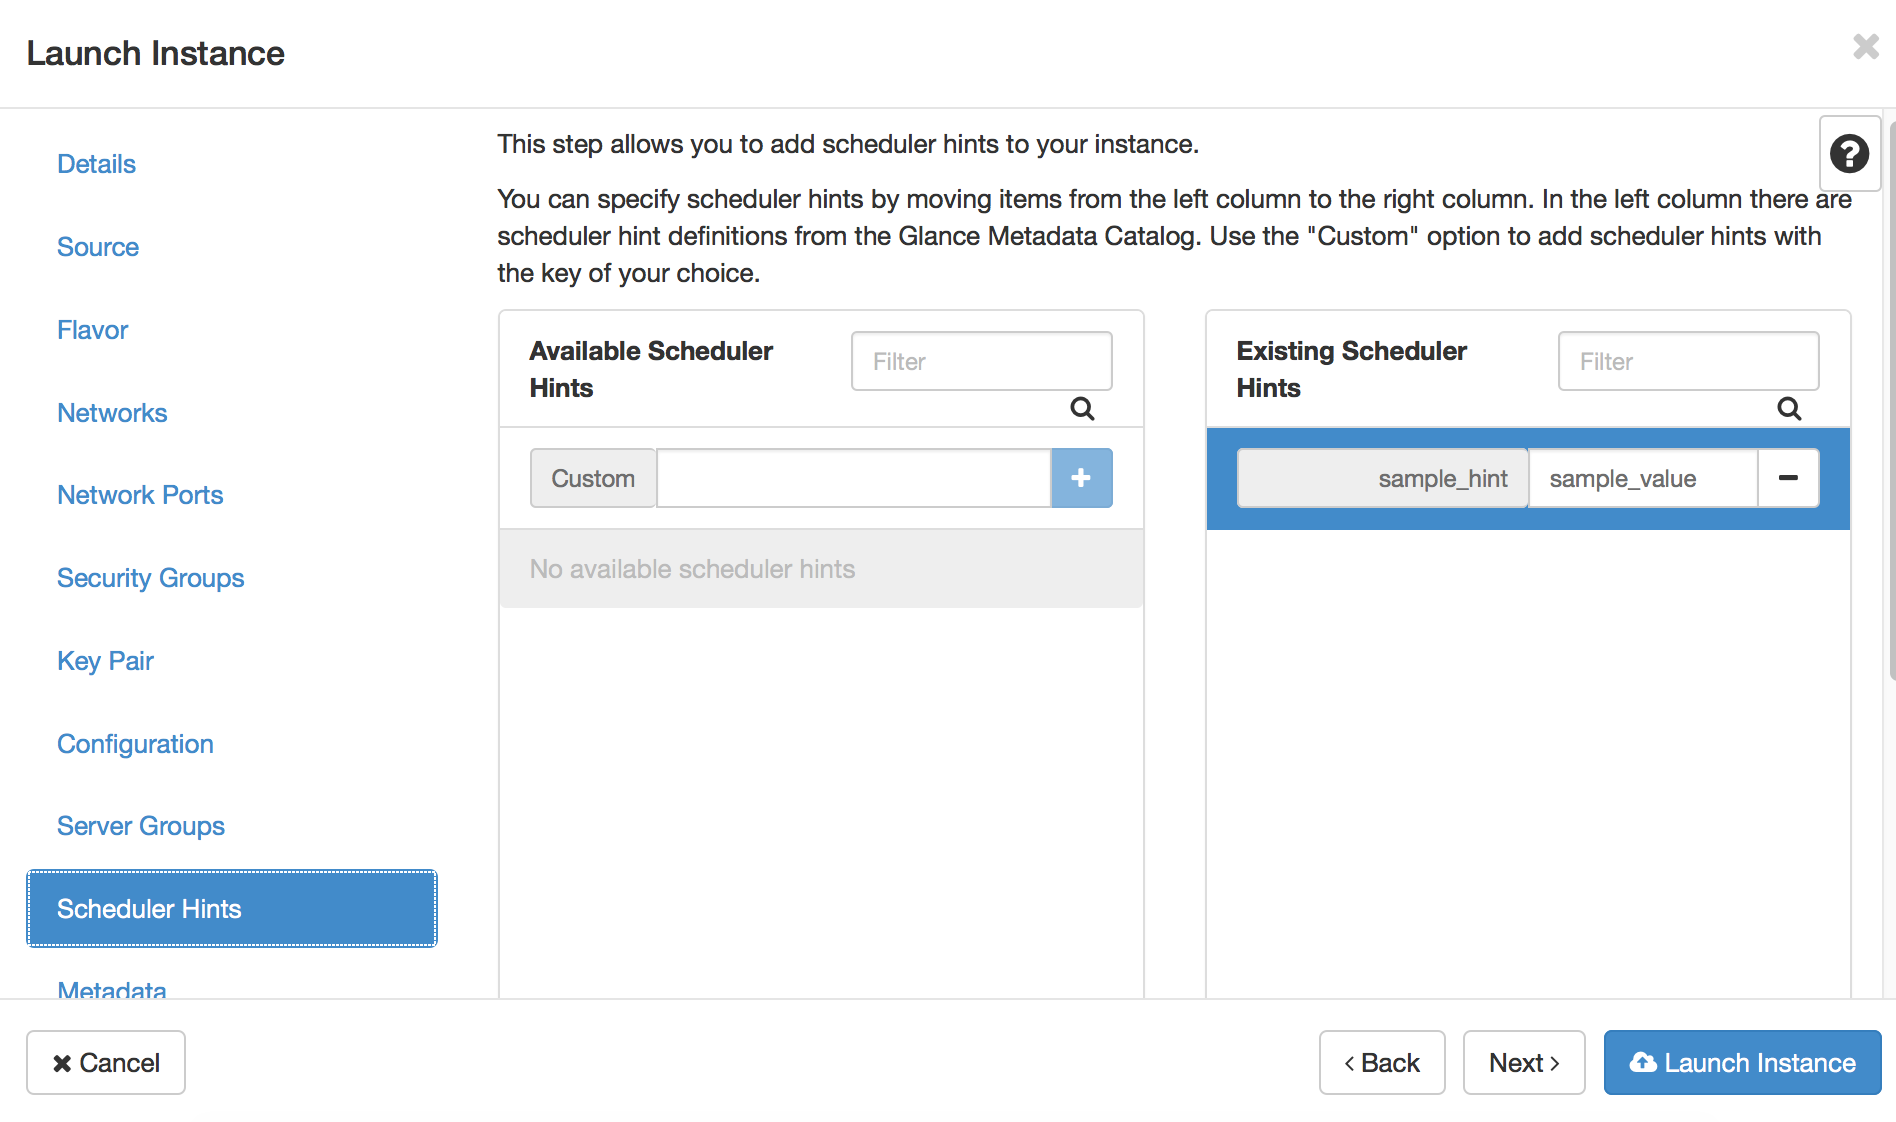
The Scheduler Hints tab
The scheduler hints can be used to pass additional placement related information to the Nova scheduler. For example, you can use a scheduler hint to ensure that an instance is scheduled on to a host from a certain server group. You can also construct a custom scheduler hint in JSON format. For more details about the scheduling mechanism and the supported hint types, see Compute Schedulers.
The Metadata tab
Glance provides a common API to define key and value pairs that tag metadata for different types of resources (images, artifacts, volumes, flavors, aggregates, and so on). If the image that you select contains pre-defined metadata, you’ll see that in the Available metadata column.
You can create additional key and value pairs in the Custom field and click the plus sign (+) to move them to the Existing metadata list. For example, custom metadata is a parameter that you’d want to pass to the application, so it can be installed with the instance.

For more information about Glance metadata, see Metadata Definition Concepts and Using Glance’s Metadata Definitions Catalog Public APIs.
How to connect to your instance
Note: Be sure that proper security group rules are defined for connecting to your instance over ssh or rdp.
-
Log into the IBM Bluemix Private Cloud Horizon dashboard.
-
Expand the Project panel, then the Compute tab in the left navigation area, and click on Instances.
-
Locate your instance in the list of running instances and note its IP address, such as
192.168.100.237. -
Create a connection to your instance by specifying its IP address.
Connecting to Linux instances
Connect to your instance through SSH or VNC. The default userid for the Linux images provided by IBM is ibmcloud. Once you’ve connected to your Linux instance, you can use the sudo command to execute commands that normally require root access. Sudo is configured not to require a password for the default userid.
-
Using your favorite SSH client, open a connection to the correct IP address of the VM instance, employing the private SSH key of the keypair that you specified during provisioning:
ssh -i <path_of_Your_SSH_private_key_file> <userid>@<ip_of_instance> -
From the IBM Bluemix Private Cloud Horizon dashboard, view the VNC console of the instance by clicking Console from the drop-down list in the Actions column of the instance. The VNC console connects you with HTTPS.
Note: To log in to a new Linux instance, via the console, as ibmcloud user, you must have specified a password previously, in the Customization Script during provisioning.
Connecting to Windows instances
Connect to your instance through Remote Desktop or VNC. You’ll need to use the userid and password you specified in the Customization Script during VM provisioning. On your first login, a prompt appears, requesting that you change your password. Please do.
- Use your favorite Remote Desktop client to connect.
- From the IBM Bluemix Private Cloud Horizon dashboard, view the VNC console of the instance by clicking Console from the drop-down list in the Actions column of the instance. The VNC console connects you with HTTPS.
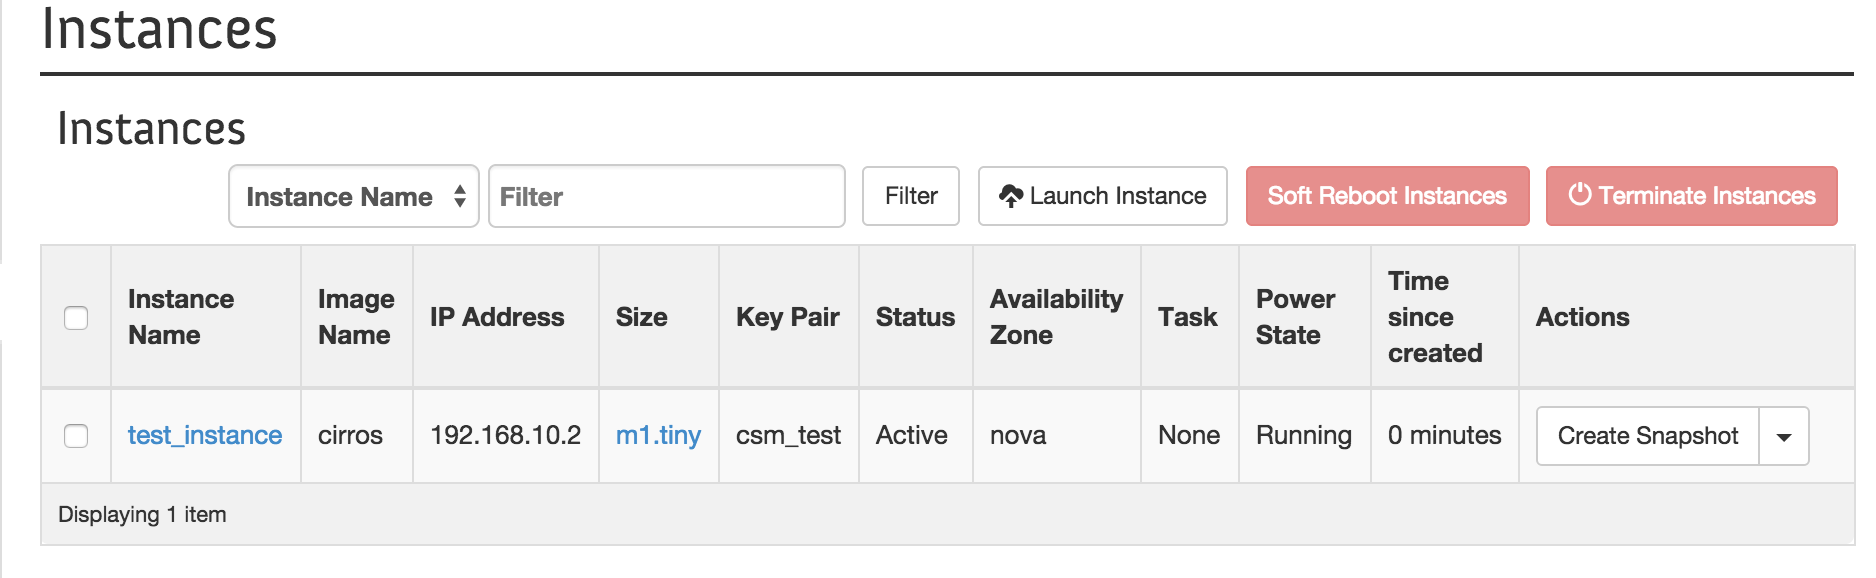
How to manage your instances
Under the Project topic, expand Compute and click Instances.
The dashboard displays the list of instances for the current project. In the Actions column, a drop-down list displays your options, as shown below:
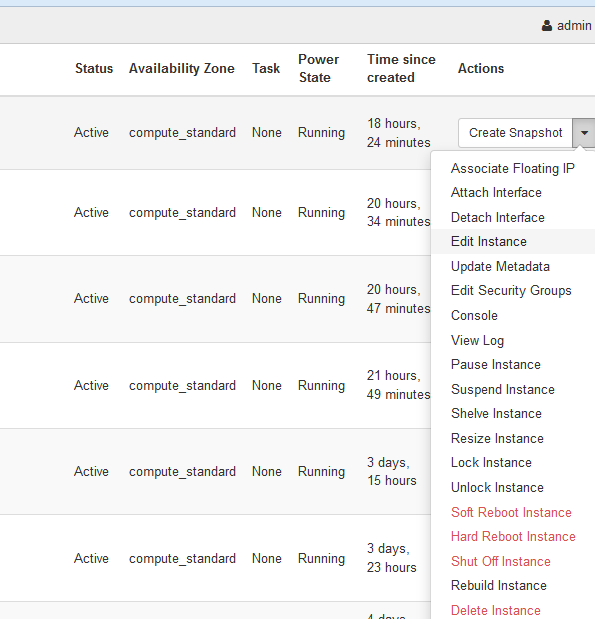
- Creates snapshot: creates a snapshot of the instance.*
- Associate Floating IP: associates an available floating IP to a port of your instance.
- Attach an Interface: attaches the interface to a network.
- Detach an Interface: removes a port that you created for the instance.
- Edit instance: changes the instance name, or uploads the security groups.
- Update metedata: updates the custom metadata that you specified for the instance.
- Edit Security Groups: removes an existing security group or assigns a new security group.
- Console: views the VNC console of the instance.
- View Log: views the instance log.
- Pause instance: pauses the instance and saves its state in memory. This option keeps the resources (vCPUs and memory).
- Suspend instance: suspends the instance and saves its state to the disk. This option frees up resources (vCPUs and memory).
- Shelve instance: shelves the image and shuts down the instance.
- Resize instance: updates the flavor setting of the instance.
- Lock instance: locks the instance.
- Unlock instance: unlocks the instance.
- Soft Reboot Instance: performs a graceful shutdown and restart of the instance.
- Hard Reboot Instance: performs the equivalent of a power reset of the server.
- Shut off Instance: performs a power off the instance.
- Rebuild Instance: rebuilds the instance with another image.
- Delete Instance: delete the instance.
Click the option for the operation you need to apply.