

-
Getting Started (38)

- Connecting to your OpenVPN server
- Setting up OpenVPN server on your instance
- Bluemix Private Cloud Components
- What Should I Do Prior to Detaching a Volume?
- Virtual python environments and you: A developer's primer
- Technical FAQ
- IBM Bluemix Private Cloud Building Blocks (Community Edition)
- Building Blocks for IBM Bluemix Private Cloud with Red Hat
- IBM Bluemix Private Cloud with Red Hat - Product Overview
- General Product Overview
- Resizing an Instance (Non-live)
- Set Up Network Connectivity Between Multiple Cloud Environments, Using the Private Network
- Customer Guide for Windows Activation
- View More ( 7 )
Common Technical Questions
- Adding or removing subscribers to a ticket
- How do I view my bill?
- How do I report an issue?
- How do I escalate a ticket?
- Bluemix Private Cloud Status Pages
- Transferring A Domain From Blue Box
- View More ( 2 )
Common Administrative Questions
- Box Panel User Guide
- Box Panel, Site Controller, and IBM Bluemix Private Cloud Local
- Building Up to OpenStack — QEMU and Your Cloud
- Building Up to OpenStack II -- Improving Cloud Performance
- Cloud 101 -- Optimized Load Balancing
- User's Guide to Cloud Images (IBM Bluemix Private Cloud with Red Hat)
- User's Guide to Cloud Images (Community Edition)
- IBM Bluemix Private Cloud Image Release Notes
- View More ( 4 )
User Guides
-
Troubleshooting (19)
-
Open Stack (15)
-
Horizon [GUI] (10)
-
Nova [Compute] (13)
-
Neutron [Networking] (22)
-
Glance [Images] (6)
-
Cinder [Block Storage] (13)
-
Keystone [Identity] (8)
-
Heat [Orchestration] (7)
-
Ceilometer [Telemetry] (1)
Connecting to your OpenVPN server
Now that you’ve created an OpenVPN server on your OpenStack cluster, it’s time to connect to it:
Remember that the connection will be called whatever you named the .ovpn file. In our example, since the file was named Client1.ovpn, the connection will be named Client1.
Windows
Installing
The OpenVPN client application for Windows can be found on the OpenVPN Downloads page. Choose the appropriate installer version for your version of Windows.
Note: OpenVPN needs administrative privileges to install.
After installing OpenVPN, copy the unified DigitalOcean.ovpn profile to:
C:\Program Files\OpenVPN\config
When you launch OpenVPN, it will automatically see the profile and make it available.
OpenVPN must be run as an administrator each time it’s used, even by administrative accounts. To do this without having to right-click and select Run as administrator every time you use the VPN, you can preset this value, but it must be done from an administrative account. This restriction also means that standard users will need to enter the administrator’s password to use OpenVPN. On the other hand, standard users can’t properly connect to the server unless OpenVPN on the client has admin rights, so the elevated privileges are necessary.
To set the OpenVPN application to always run as an administrator, right-click on its shortcut icon and go to Properties. At the bottom of the Compatibility tab, click the button to Change settings for all users. In the new window, check Run this program as an administrator.
Connecting
Each time you launch the OpenVPN GUI, Windows will ask if you want to allow the program to make changes to your computer. Click Yes. Launching the OpenVPN client application only puts the applet in the system tray so the the VPN can be connected and disconnected as needed; it does not actually make the VPN connection.
Once OpenVPN is started, initiate a connection by going into the system tray applet and right-clicking on the OpenVPN applet icon. This opens the context menu. Select Client1 at the top of the menu (that’s our Client1.ovpn profile) and choose Connect.
A status window will open showing the log output while the connection is established, and a message will show once the client is connected.
Disconnect from the VPN the same way: Go into the system tray applet, right-click the OpenVPN applet icon, select the client profile and click Disconnect.
OS X
Installing
Tunnelblick is a free, open source OpenVPN client for Mac OS X. You can download the latest disk image from the Tunnelblick Downloads page. Double-click the downloaded .dmg file and follow the prompts to install.
Towards the end of the installation process, Tunnelblick will ask if you have any configuration files. It can be easier to answer No and let Tunnelblick finish. Open a Finder window and double-click DigitalOcean.ovpn. Tunnelblick will install the client profile. Administrative privileges are required.
Connecting
Launch Tunnelblick by double-clicking Tunnelblick in the Applications folder. Once Tunnelblick has been launched, there will be a Tunnelblick icon in the menu bar at the top right of the screen for controlling connections. Click on the icon, and then the Connect menu item to initiate the VPN connection. Select the Client1 connection.
iOS
Installing
From the iTunes App Store, search for and install OpenVPN Connect, the official iOS OpenVPN client application. To transfer your iOS client profile onto the device, connect it directly to a computer.
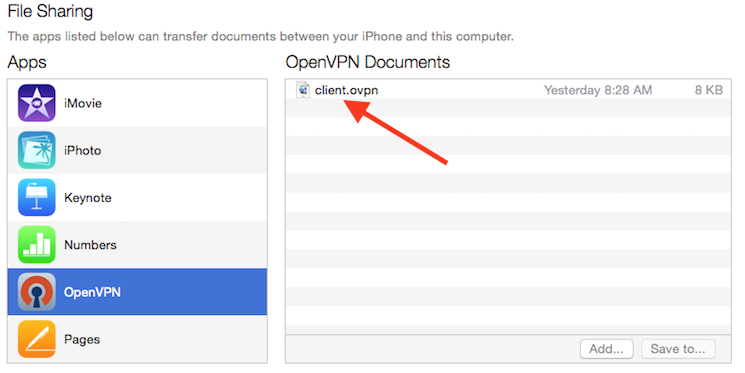
Completing the transfer with iTunes will be outlined here. Open iTunes on the computer and click on iPhone > apps. Scroll down to the bottom to the File Sharing section and click the OpenVPN app. The blank window to the right, OpenVPN Documents, is for sharing files. Drag the .ovpn file to the OpenVPN Documents window.
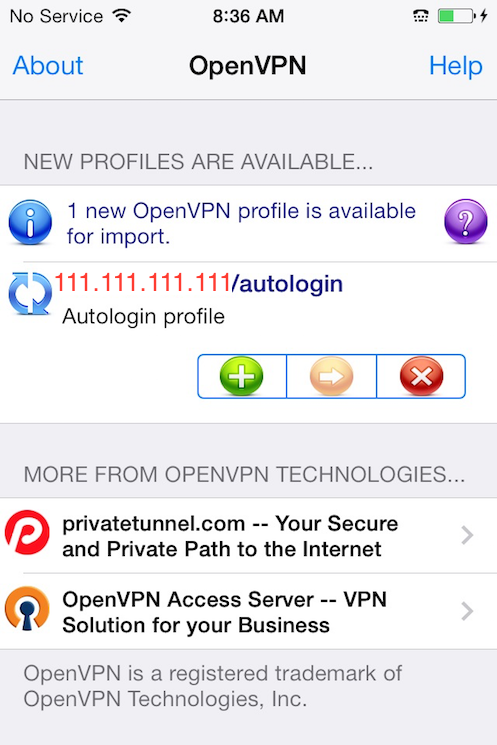
Now launch the OpenVPN app on the iPhone. There will be a notification that a new profile is ready to import. Tap the green plus sign to import it.
Connecting
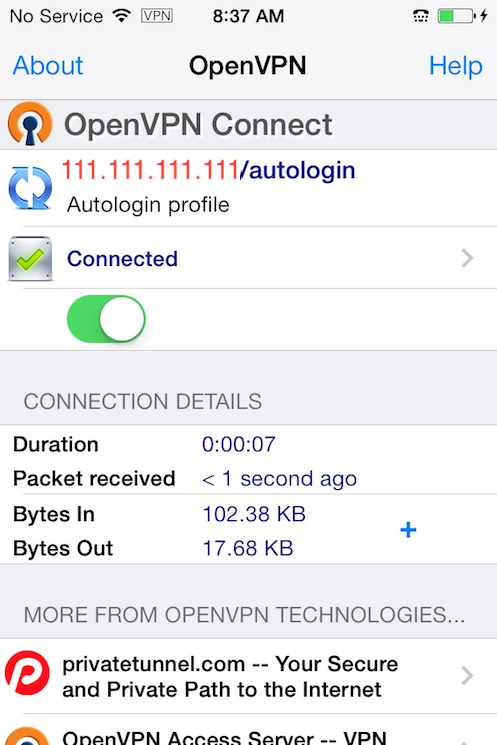
OpenVPN is now ready to use with the new profile. Start the connection by sliding the Connect button to the On position. Disconnect by sliding the same button to Off.
Note: The VPN switch under Settings cannot be used to connect to the VPN. If you try, you will receive a notice to only connect using the OpenVPN app.
Android
Installing
Open the Google Play Store. Search for and install Android OpenVPN Connect, the official Android OpenVPN client application.
The .ovpn profile can be transferred by connecting the Android device to your computer by USB and copying the file over. Alternatively, if you have an SD card reader, you can remove the device’s SD card, copy the profile onto it and then insert the card back into the Android device.
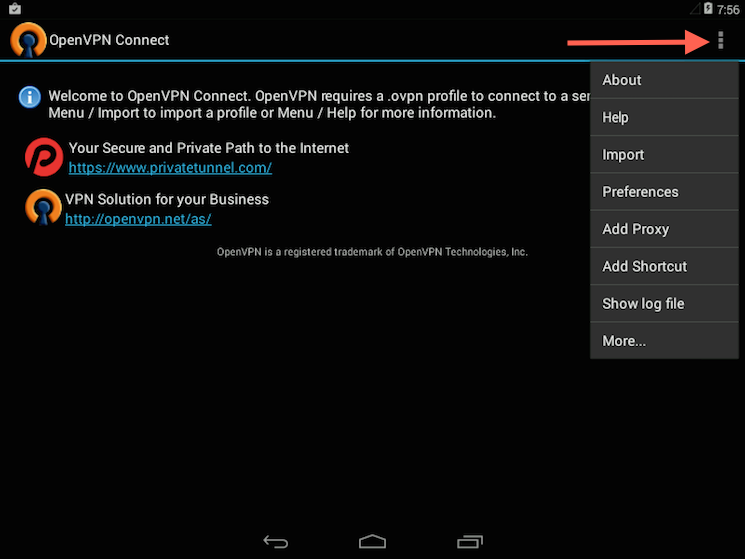
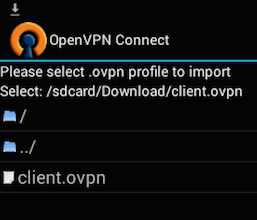
Start the OpenVPN app and tap the menu to import the profile.
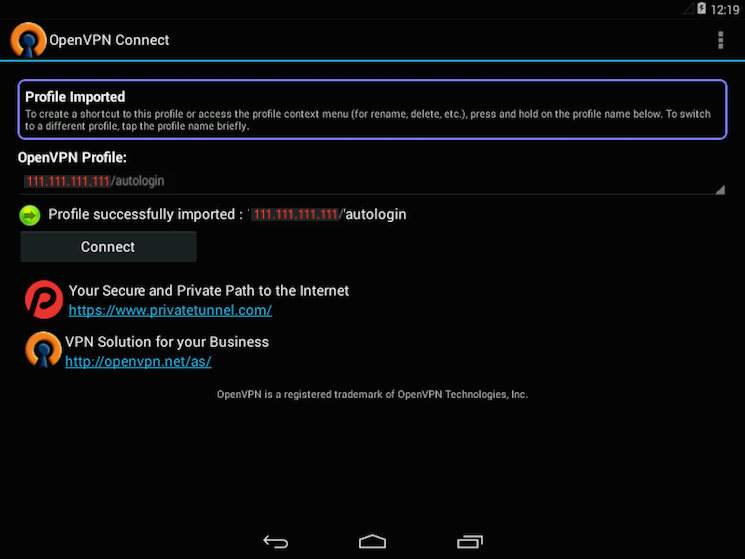
Then navigate to the location of the saved profile (the screenshot uses /sdcard/Download/) and select the file. The app will make a note that the profile was imported.
Connecting
To connect, simply tap the Connect button. You’ll be asked if you trust the OpenVPN application. Choose OK to initiate the connection. To disconnect from the VPN, go back to the the OpenVPN app and choose *Disconnect.
Testing Your VPN Connection
Once everything is installed, a simple check confirms everything is working properly. Without having a VPN connection enabled, open a browser and go to DNSLeakTest.
The site will return the IP address assigned by your internet service provider and as you appear to the rest of the world. To check your DNS settings through the same website, click on Extended Test and it will tell you which DNS servers you are using.
Now connect the OpenVPN client to your Droplet’s VPN and refresh the browser. The completely different IP address of your VPN server should now appear. That is now how you appear to the world. Again, DNSLeakTest Extended Test will check your DNS settings and confirm you are now using the DNS resolvers pushed by your VPN.
Congratulations! You are now securely traversing the Internet while protecting your identity, location, and traffic from snoopers and censors.